


No More Nails Adhesive Open Time, Grab Strength, and Cure Testing Guide
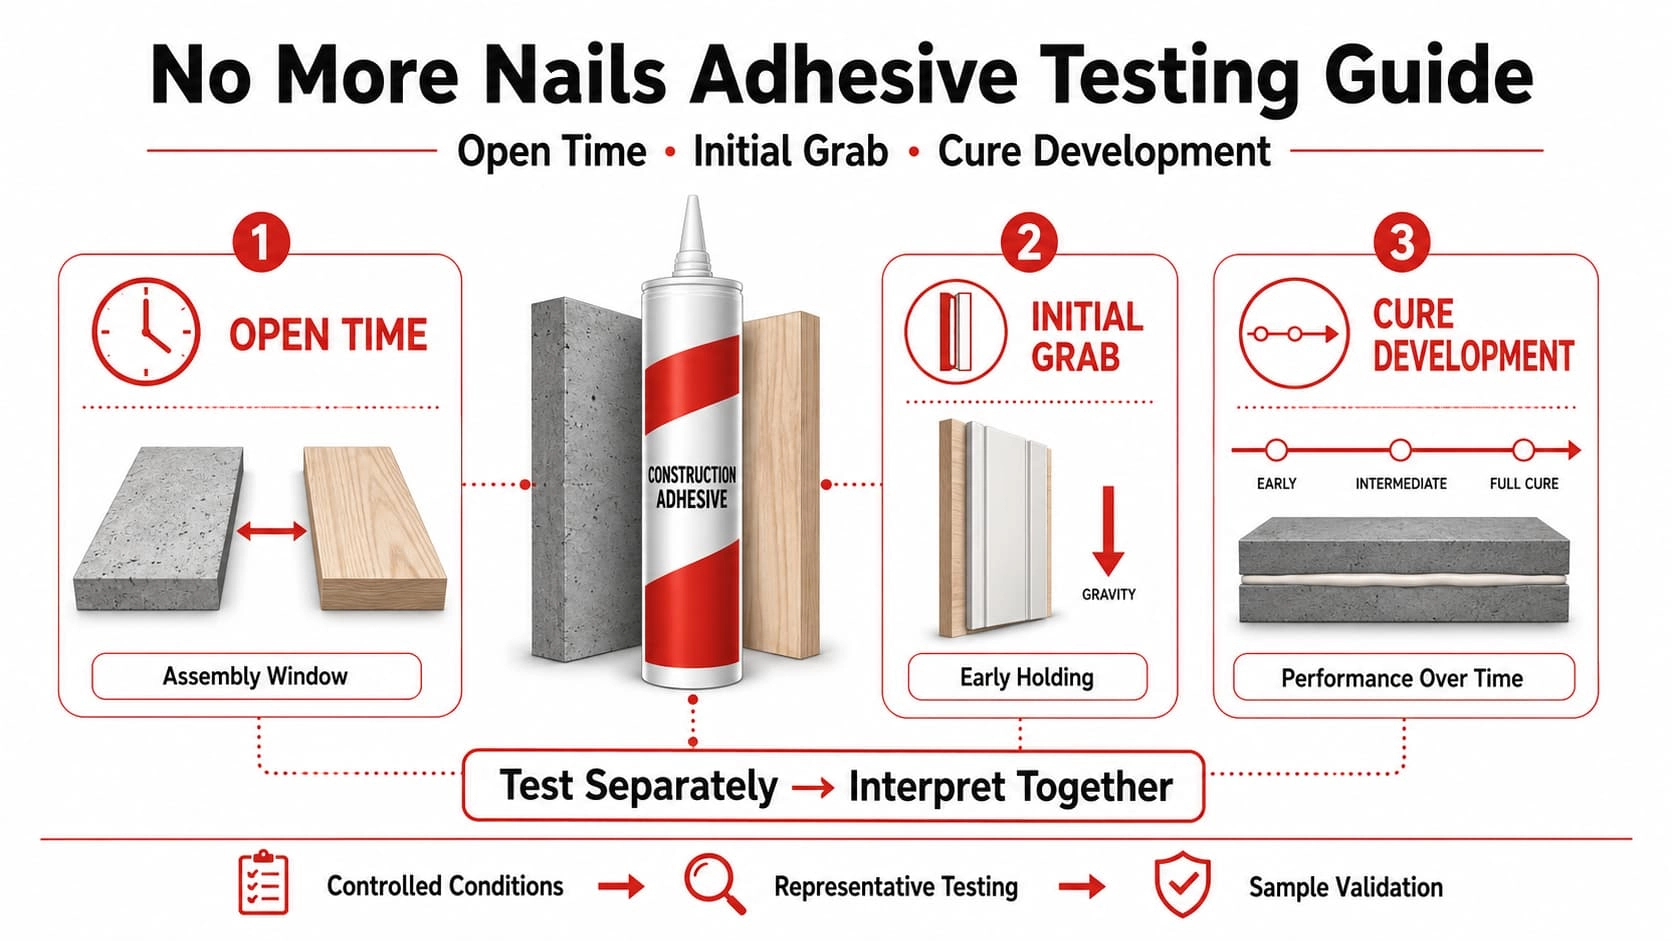
- What Do Open Time, Initial Grab, and Cure Development Mean?
- What Is Adhesive Open Time?
- What Is Initial Grab?
- What Is Cure Development?
- Why Open Time, Initial Grab, and Cure Must Be Tested Separately
- High Grab Does Not Prove Final Bond Performance
- Longer Open Time Is Not Automatically Better
- Fast Setting Does Not Mean Full Cure
- Control the Test Conditions Before Comparing Adhesives
- Define the Substrate Pair
- Standardize Surface Preparation
- Control Adhesive Geometry and Application Amount
- Record Temperature and Relative Humidity
- Keep Assembly Pressure Consistent
- Test Conditions to Record
- How to Test No More Nails Adhesive Open Time
- Step 1 — Define the Open-Time Question
- Step 2 — Prepare Comparable Specimens
- Step 3 — Use Defined Assembly Intervals
- Step 4 — Assemble Each Specimen Consistently
- Step 5 — Evaluate After the Agreed Conditioning Period
- Open-Time Test Record
- How to Test Initial Grab
- Step 1 — Define the Installation Challenge
- Step 2 — Select a Representative Orientation
- Step 3 — Standardize the Component and Bond Area
- Step 4 — Define Early Observation Checkpoints
- Step 5 — Measure Holding Behavior
- Initial-Grab Test Record
- Is Grab Strength the Same as Lap-Shear Strength?
- How to Evaluate Cure Development
- Step 1 — Define What You Need to Observe
- Step 2 — Define Multiple Conditioning Checkpoints
- Step 3 — Keep Specimen Design Constant
- Step 4 — Use Separate Equivalent Specimens for Destructive Tests
- Step 5 — Record Performance Development
- Cure-Development Record
- What Factors Can Change Open-Time, Grab, and Cure Results?
- Temperature
- Relative Humidity
- Substrate Porosity
- Bead and Bond-Line Geometry
- Surface Condition
- Product Chemistry and Cure Mechanism
- How to Read Open Time, Grab, and Cure Results Together
- Record Failure Mode, Not Just Pass or Fail
- Adhesive Failure
- Cohesive Failure
- Substrate or Coating Failure
- Slip or Early Movement
- Mixed Failure
- Laboratory Tests vs Representative Application Tests
- Controlled Laboratory Testing
- Representative Application Testing
- One Does Not Automatically Replace the Other
- Use Test Standards Only When Their Scope Matches the Question
- ISO 4587:2003
- ASTM D905-08(2021)
- ASTM D3498-19a
- How Should Private-Label Buyers Use the Test Results?
- Convert Observations Into Acceptance Criteria
- Keep the Test Method With the Approved Result
- Use the Same Basis for Later Comparison
- Evaluating a KINGDELI No More Nails Sample
- Common Adhesive Testing Mistakes
- Using One Published Cure Time for Every Grade
- Treating Initial Grab as Final Strength
- Changing Substrates Between Samples
- Ignoring Temperature and Humidity
- Using Different Bead Sizes or Bond Areas
- Reporting “Pass” Without Failure Mode
- Comparing Different Test Methods as If They Were Equivalent
- A Practical Buyer Test Sequence
- No More Nails Adhesive Testing Record Template
- A. Document Control
- B. Substrate and Surface Conditions
- C. Adhesive Application
- D. Test Environment
- E. Final Sample Evaluation
- FAQ: No More Nails Open Time, Grab, and Cure Testing
- How long is the open time of No More Nails adhesive?
- Is initial grab the same as final bond strength?
- How long does No More Nails adhesive take to fully cure?
- How should buyers test initial grab?
- Should buyers test the actual project substrates?
- Build a Repeatable Test Method, Not a Universal Number
- Discuss Your Adhesive Test Requirements
There is no single open time, grab strength, or cure time that applies to every No More Nails adhesive.
These properties depend on the exact formulation, substrates, adhesive geometry, temperature, humidity, surface condition, and application method.
Quick Answer
Buyers should test open time, initial grab, and cure development separately under controlled and representative conditions, then interpret the results together. The goal is not to find one universal No More Nails number. The goal is to determine whether a specific adhesive grade fits a specific installation.
For buyers, distributors, private-label teams, and technical evaluators, the better question is not:
Not: “What is the No More Nails cure time?”
Instead: “How should this specific adhesive grade be tested under conditions that represent the intended application?”
A practical validation sequence is:
Define the application → Control the test conditions → Test open time → Test initial grab → Track cure development → Record failure mode → Compare against acceptance criteria → Approve, reject, or retest.
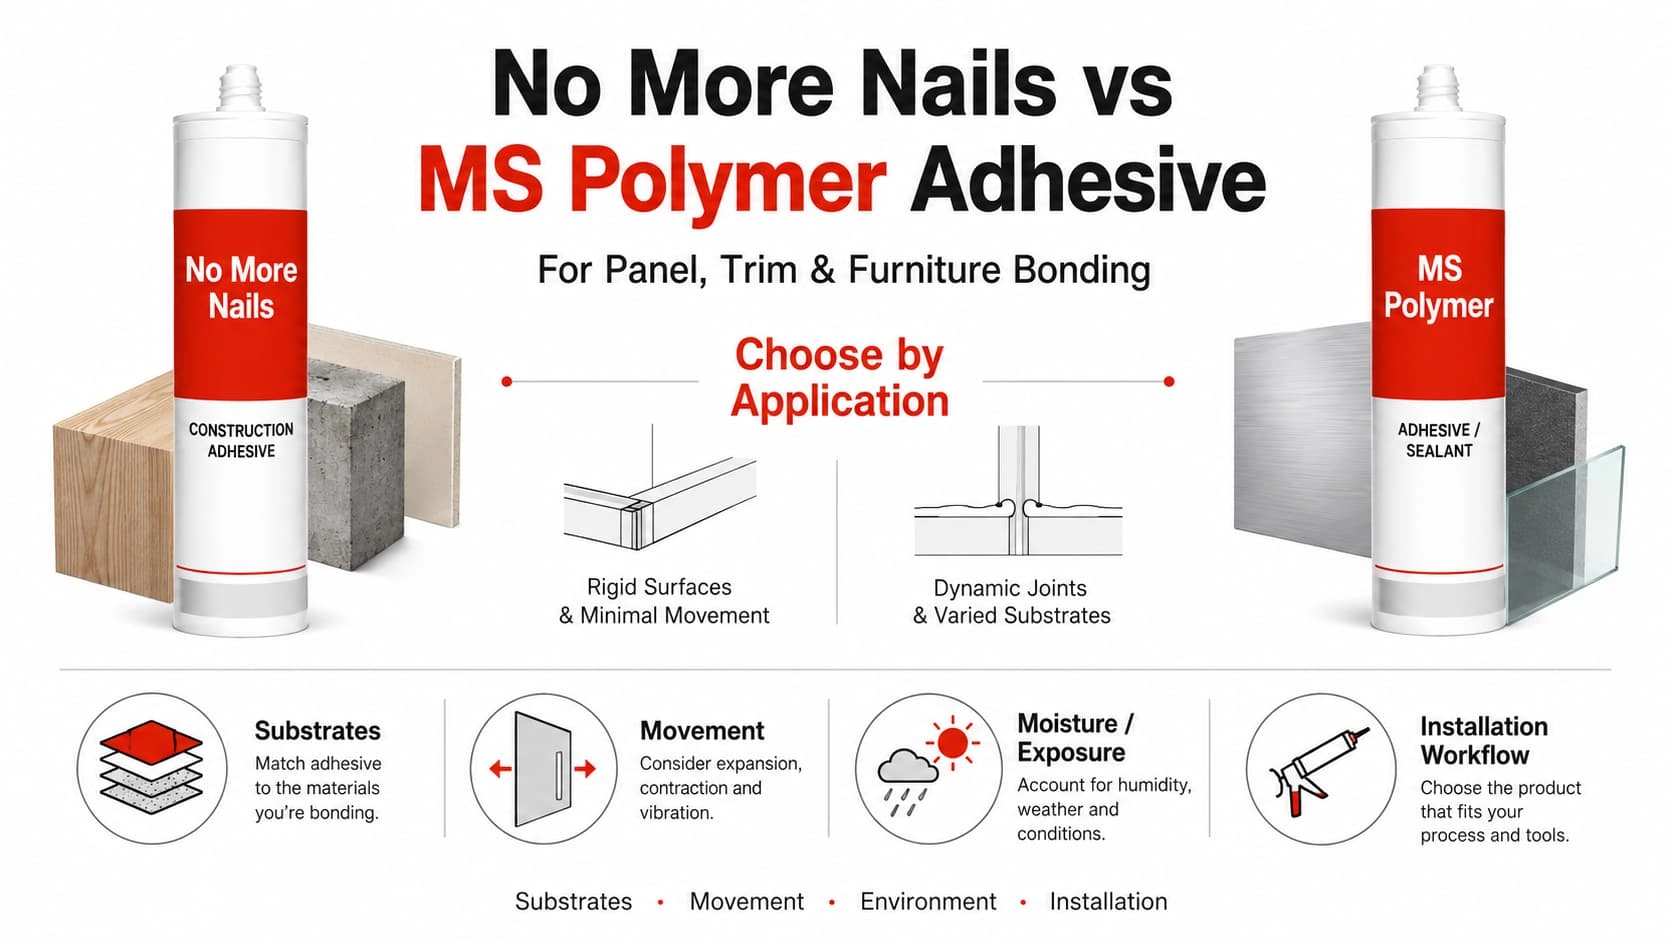
If you are still deciding which adhesive route fits the application, first review the No More Nails vs MS Polymer Adhesive comparison guide.
What Do Open Time, Initial Grab, and Cure Development Mean?
The three terms describe different stages of adhesive performance. Confusing them can lead to incorrect product approval.
What Is Adhesive Open Time?
Open time is the usable interval after adhesive application during which the substrates can still be assembled and form an acceptable bond under the defined application conditions.
It is not the same as:
- Full cure time
- Final bond strength
- Skin formation time
- Necessarily the same thing as installer repositioning time
An open-time test asks a specific question:
How long can the adhesive remain exposed after application before delayed assembly begins to reduce acceptable bond formation?
The answer is product-specific. For a buyer, the useful value is not a generic number found online. It is the working window of the exact adhesive grade under the intended substrates and installation conditions.
What Is Initial Grab?
Initial grab, sometimes described as initial tack, is the ability of an adhesive to resist slip, movement, or separation shortly after the bonded components are assembled and before the adhesive has fully cured.
This is primarily an installation-performance property.
Consider a trim piece bonded vertically to a wall. Immediately after installation, the useful questions are:
- Does the trim remain where it was positioned?
- Does it slide?
- Does one edge pull away?
- Is temporary support required?
- How much movement occurs before the adhesive develops more strength?
High initial grab means stronger early holding behavior under the test conditions. It does not automatically mean stronger final adhesion after cure.
What Is Cure Development?
Cure development describes how the bonded assembly progresses from the freshly applied state toward developed adhesive performance over time.
Depending on the exact product and application, buyers may need to distinguish between:
- Early installation stability
- Handling development
- Later bonded performance
- Performance after the agreed conditioning period
A surface that appears set or dry does not necessarily mean the complete bond line has reached its developed performance. A more useful test question is: How does this adhesive assembly develop over defined conditioning periods under the intended test conditions?
Why Open Time, Initial Grab, and Cure Must Be Tested Separately
Open time, initial grab, and cure development describe different stages of adhesive performance. A product may provide strong early holding but a short assembly window, or adequate working time while requiring temporary support during early cure. Buyers should evaluate all three properties separately before judging overall application suitability.
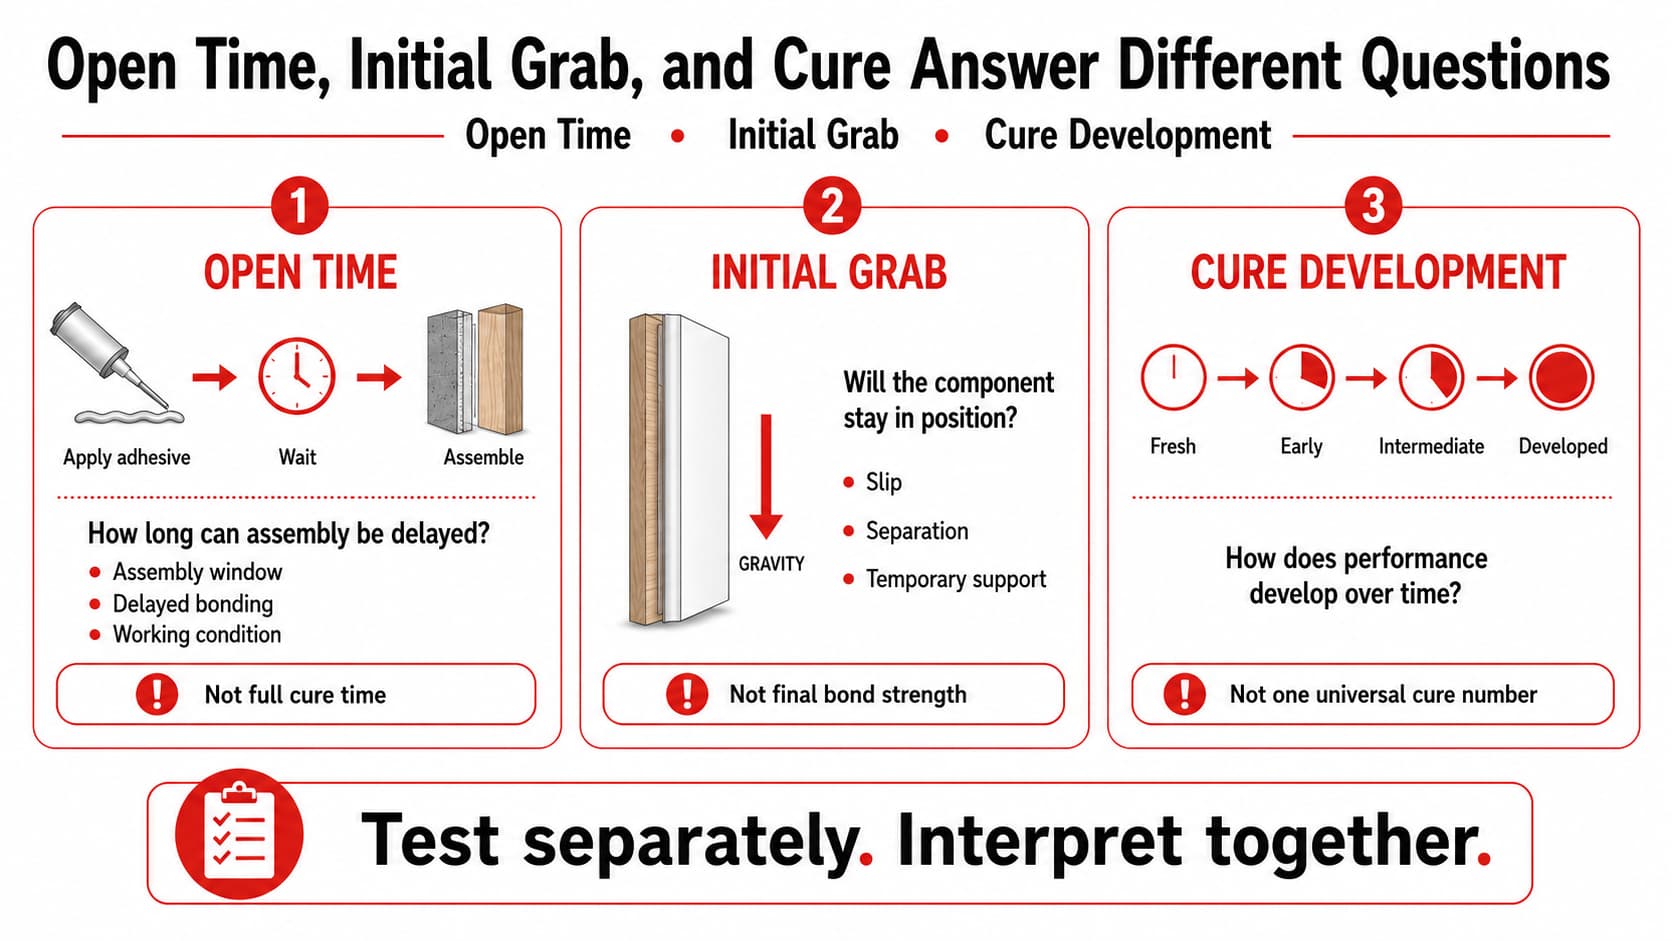
A product could provide:
- Strong early grab but limited adjustment time
- Long positioning time but more early slip
- Satisfactory initial holding but poor later bond development
- Modest early holding but acceptable developed performance
High Grab Does Not Prove Final Bond Performance
A component that stays in place immediately after assembly has passed an installation challenge. It has not necessarily passed a final bond-performance requirement.
The later assembly could still be limited by:
- Poor substrate compatibility
- Weak coating adhesion
- Inadequate cure
- Unsuitable bond geometry
- Another application-specific limitation
Sample approval should therefore never be based only on the impression that the adhesive “grabs strongly.”
Longer Open Time Is Not Automatically Better
Longer open time may be helpful when an installer needs to:
- Align large panels
- Reposition trim
- Adjust multiple components
- Assemble a complex joint
But longer is not automatically better. The correct question is: Does the usable assembly window fit the real installation workflow?
Fast Setting Does Not Mean Full Cure
Early skin formation, initial setting, or enough holding ability to move a component should not automatically be interpreted as full cure. Different stages answer different questions and should be recorded separately.
Control the Test Conditions Before Comparing Adhesives
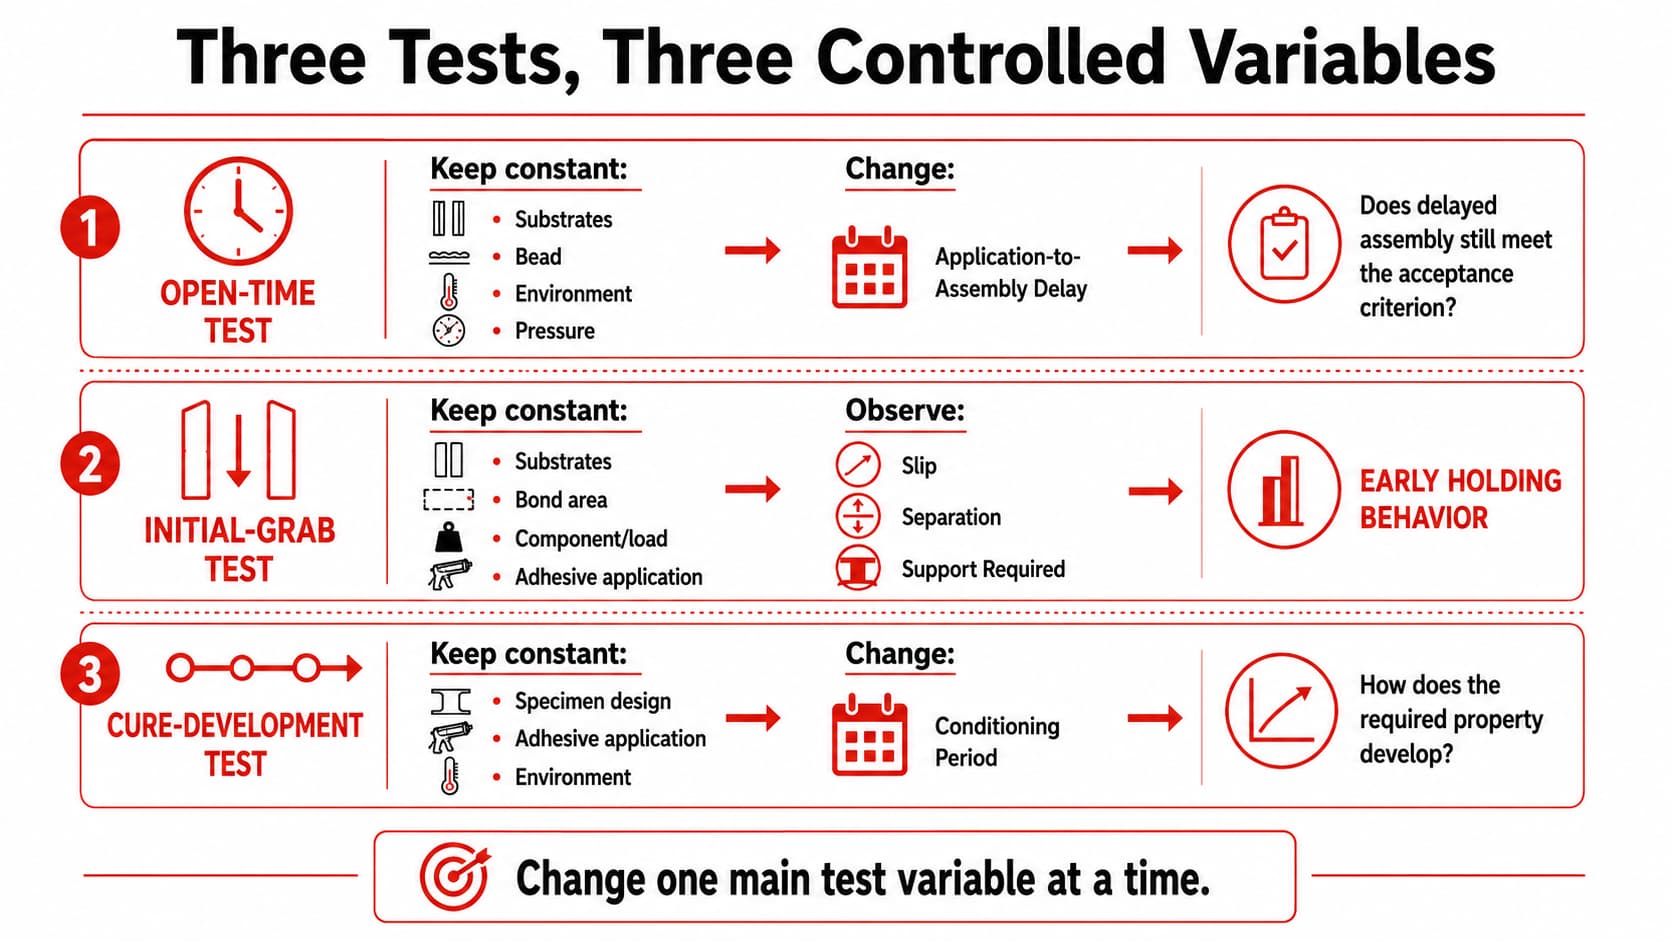
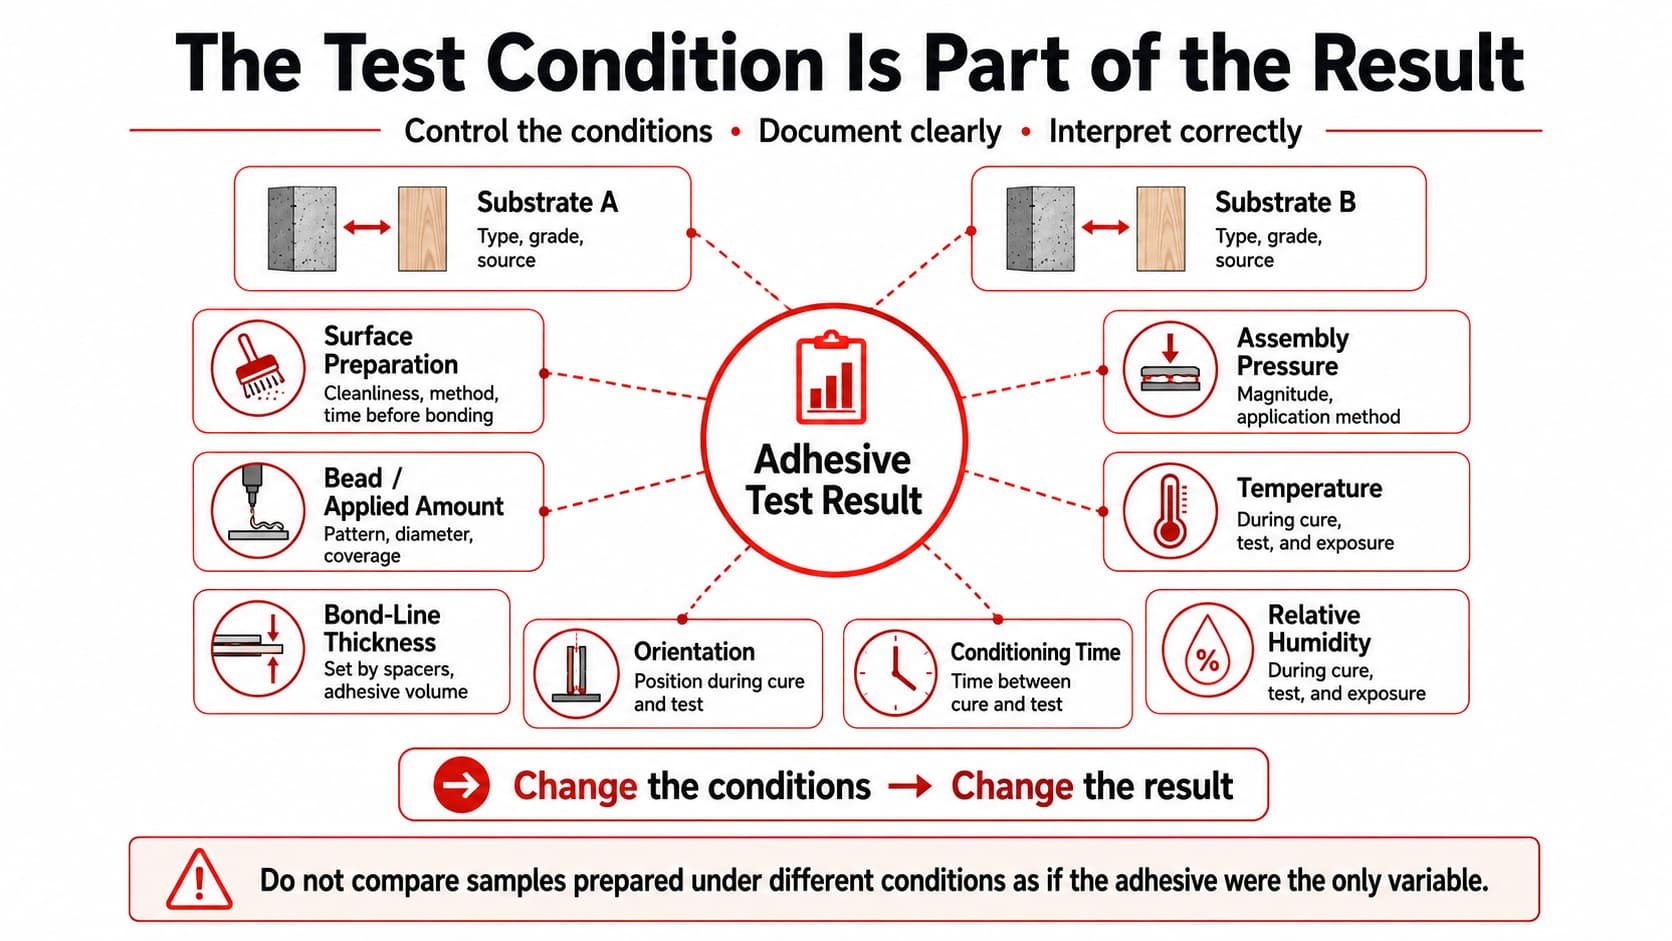
Adhesive test results are meaningful only when the important variables are recorded and controlled. If the substrates, bead size, bond-line thickness, temperature, humidity, assembly method, or conditioning period change between samples, differences in the result may come from the test conditions rather than the adhesive itself.
Define the Substrate Pair
Do not record the test simply as “panel to wall.” Record the actual materials as clearly as practical.
Relevant details may include:
- Substrate material
- Coating or paint
- Laminate
- Surface treatment
- Porous or non-porous condition
A result obtained on bare wood should not automatically be transferred to coated MDF. A result obtained on clean metal should not automatically be transferred to painted metal.
Standardize Surface Preparation
Depending on the application, the test record may need to state whether the surfaces were:
- Cleaned
- Dust-free
- Degreased where appropriate
- Sanded where appropriate
- Primed where applicable
If one specimen is tested on a properly prepared surface and another on a contaminated surface, the comparison is not controlled.
Control Adhesive Geometry and Application Amount
Useful items to standardize include:
- Bead size
- Bead pattern
- Bonded area
- Bond-line thickness
- Applied amount where measured
The objective is not necessarily to create a complex laboratory procedure. The objective is to make the specimens comparable.
Record Temperature and Relative Humidity
Temperature and humidity can influence application behavior and cure development, and their importance can vary with the exact formulation. A result obtained in one environment should not automatically be compared with a result obtained under substantially different conditions.
Keep Assembly Pressure Consistent
Assembly pressure influences contact between the adhesive and the substrates. If one specimen is pressed firmly and another is only lightly contacted, bond-line geometry and wetting may differ.
Test Conditions to Record
| Variable | What to Record | Why It Matters |
|---|---|---|
| Product | Product / sample / batch ID | Traceability |
| Substrate A | Material and surface | Adhesion condition |
| Substrate B | Material and surface | Adhesion condition |
| Surface preparation | Cleaning, sanding, primer, other | Repeatability |
| Adhesive application | Bead, amount, bonded area | Comparable specimens |
| Bond-line condition | Thickness or controlled geometry | Cure and load distribution |
| Assembly method | Pressure / fixture method | Surface contact |
| Temperature | Test condition | Application and cure |
| Relative humidity | Test condition | Cure environment |
| Orientation | Vertical, horizontal, or other | Grab challenge |
| Component / load | Defined specimen | Grab comparison |
| Assembly delay | Time after application | Open-time variable |
| Conditioning period | Time before evaluation | Cure comparison |
The test condition is not background information. It is part of the test result.
How to Test No More Nails Adhesive Open Time
Open-time testing should isolate one main variable:
The delay between adhesive application and assembly.
Everything else should remain as consistent as practical.
Step 1 — Define the Open-Time Question
The purpose of the test is to determine: How long can this adhesive remain exposed after application and still form an acceptable joint when the substrates are assembled under the chosen conditions?
Step 2 — Prepare Comparable Specimens
Use consistent:
- Substrates
- Specimen dimensions
- Surface preparation
- Adhesive bead
- Adhesive amount
- Test environment
Step 3 — Use Defined Assembly Intervals
Choose several predefined delays between application and assembly. The intervals should be appropriate for the exact product being evaluated.
Where supplier technical information is available, buyers can design the test around the reported working window. Where no confirmed value exists, a preliminary screening series can be used and then refined. One fixed sequence of minutes should not be assumed suitable for every No More Nails product.
Step 4 — Assemble Each Specimen Consistently
At each defined interval:
- Assemble the substrates in the same way
- Apply the same assembly pressure
- Maintain comparable alignment
- Maintain comparable bond geometry
- Use the same support method where required
Step 5 — Evaluate After the Agreed Conditioning Period
Do not judge open time only from the immediate feel of the uncured adhesive. After the agreed conditioning period, observations may include:
- Whether adequate contact was achieved
- Whether surface skinning interfered with assembly
- Later bond integrity
- Failure mode
- Another project-specific evaluation criterion
To test open time, keep the substrates, adhesive amount, bead geometry, assembly pressure, and environment constant while changing only the delay between adhesive application and assembly. After the agreed conditioning period, compare whether each delayed assembly still meets the defined acceptance criteria.
Open-Time Test Record
| Specimen ID | Application-to-Assembly Delay | Assembly Observation | Post-Conditioning Result | Failure Mode | Status |
|---|---|---|---|---|---|
| OT-01 | |||||
| OT-02 | |||||
| OT-03 | |||||
| OT-04 |
Acceptance Criterion: __________________________
How to Test Initial Grab
Initial-grab testing should reproduce the early installation challenge the adhesive is expected to control. The objective is not to create an unrelated final-strength test.
Step 1 — Define the Installation Challenge
Ask: What must the uncured adhesive hold before sufficient cure develops?
The real application may involve:
- Vertical trim
- Decorative panels
- Wall-mounted components
- Another defined orientation
Step 2 — Select a Representative Orientation
Use the orientation that matters to the intended application. A vertical installation can reveal downward slip that may not appear in a horizontal specimen. An overhead test should only be used where that orientation is actually relevant and can be performed safely.
Step 3 — Standardize the Component and Bond Area
Keep the following consistent:
- Specimen dimensions
- Component mass or defined test load
- Bonded area
- Adhesive bead pattern
- Assembly pressure
- Substrate preparation
Step 4 — Define Early Observation Checkpoints
Choose defined early-stage observation periods that match the installation question. Do not use vague descriptions such as “it held for a while.”
Step 5 — Measure Holding Behavior
Useful observations include:
- No visible movement
- Measured displacement
- Partial separation
- Complete separation
- Temporary support required
Initial grab should be tested using a representative substrate pair, component or defined load, bond area, orientation, adhesive application, and observation time. Record measurable slip, separation, or need for temporary support rather than relying only on subjective descriptions such as “strong grab.”
Initial-Grab Test Record
| Component / Specimen | |
| Component Weight / Defined Load | |
| Orientation | |
| Bonded Area | |
| Bead Pattern | |
| Assembly Pressure | |
| Temporary Support | Yes / No |
| Observation Checkpoints |
| Checkpoint | Slip / Movement | Separation | Support Required | Result |
|---|---|---|---|---|
| G-1 | ||||
| G-2 | ||||
| G-3 |
Acceptance Criterion: __________________________
Is Grab Strength the Same as Lap-Shear Strength?
No. Initial grab and lap-shear strength answer different questions.
Initial grab evaluates early holding behavior during installation. Lap-shear testing evaluates the strength of a bonded specimen under a defined loading method after the required specimen preparation and conditioning.
ISO 4587:2003 specifies a tensile lap-shear method for rigid-to-rigid bonded assemblies under defined conditions. It should not be described as a universal No More Nails “grab test.”
A relevant lap-shear method may be useful for developed bond-performance evaluation when the substrates, joint, and test objective fit the method. That is a different task from determining whether a trim piece slips immediately after installation.
How to Evaluate Cure Development
Cure evaluation should track performance development over time rather than rely on one universal “full cure” value.
Step 1 — Define What You Need to Observe
Possible objectives include:
- Early component stability
- Handling behavior
- Developed bond performance
- Failure mode
- Another agreed application criterion
Instead of asking only “Is it cured?”, ask: Has the bonded assembly developed enough of the required property at this conditioning stage?
Step 2 — Define Multiple Conditioning Checkpoints
| Stage | What It May Evaluate |
|---|---|
| Early Stage | Installation stability |
| Intermediate Stage | Handling development |
| Developed Stage | Application-specific bond evaluation |
No universal number of hours should be assigned to these stages without product-level evidence.
Step 3 — Keep Specimen Design Constant
Maintain consistent:
- Substrates
- Preparation
- Bead geometry
- Bond-line condition
- Assembly method
- Environmental conditions
Step 4 — Use Separate Equivalent Specimens for Destructive Tests
If the evaluation destroys or significantly damages the joint, use separate equivalent specimens for different conditioning checkpoints. A specimen that has already been mechanically tested should not be treated as an undisturbed specimen at the next cure stage.
Step 5 — Record Performance Development
For each checkpoint, record:
- Conditioning period
- Evaluation method
- Result
- Failure mode
- Acceptance status
Cure testing should track how equivalent bonded specimens develop over defined conditioning periods rather than rely on one universal “full cure” time. Keep specimen preparation and environment constant, evaluate the application-relevant property at each checkpoint, and record both the result and the failure mode.
Cure-Development Record
| Specimen ID | Conditioning Period | Evaluation Method | Result | Failure Mode | Status |
|---|---|---|---|---|---|
| C-01 | |||||
| C-02 | |||||
| C-03 | |||||
| C-04 |
What Factors Can Change Open-Time, Grab, and Cure Results?
Changes in test conditions can change the result even when the adhesive itself has not changed.
Temperature
Temperature can influence application behavior, viscosity, early holding, working characteristics, and cure or drying development. Record the actual test condition.
Relative Humidity
Humidity can affect cure development depending on the formulation and cure mechanism. It should therefore be recorded rather than assumed to be irrelevant.
Substrate Porosity
Porous and non-porous substrates can create different drying or curing environments. The same cure assumptions should not automatically be transferred between different substrate systems.
Bead and Bond-Line Geometry
A thin adhesive layer and a thick bead do not necessarily cure or behave in the same way. Application amount, bead geometry, and bond-line thickness should remain consistent during comparative testing.
Surface Condition
Paint, coatings, contamination, primers, dust, and surface treatments can influence adhesive contact, wetting, adhesion, and apparent failure mode. The actual surface being bonded should be treated as part of the specimen.
Product Chemistry and Cure Mechanism
Products sold within a broad construction-adhesive category may use different formulation technologies. The test method should therefore be based on the exact product and application rather than an assumed universal No More Nails cure mechanism.
Changes in temperature, humidity, substrate porosity, surface condition, adhesive thickness, and product chemistry can change open-time, grab, and cure observations. Test conditions should be recorded as part of the result, not treated as background information.
How to Read Open Time, Grab, and Cure Results Together
No single result should approve an adhesive. The useful decision comes from understanding how the three properties work together.
| Combined Result | Possible Interpretation | Buyer Decision Question |
|---|---|---|
| Adequate open time + adequate grab + acceptable cure development | Balanced candidate | Does it meet the final application criteria? |
| Shorter open time + strong early grab | Fast placement with limited adjustment | Can installers assemble consistently within the working window? |
| Longer open time + lower early holding | More alignment time but more temporary support | Is that support acceptable? |
| Strong initial grab + poor developed bond result | Early holding is not sufficient | What limited the conditioned assembly? |
| Slow early development + acceptable later performance | More handling time may be required | Does the production or installation schedule allow it? |
| Highly variable repeat results | Test or product consistency concern | Were test conditions actually controlled? |
| Substrate or coating failure | Adhesive may not be the limiting layer | Is the complete substrate system suitable? |
No single open-time, grab, or cure result should approve an adhesive by itself.
Buyers should ask whether the adhesive provides enough assembly time, enough early holding behavior, and acceptable developed performance for the real installation workflow.
Record Failure Mode, Not Just Pass or Fail
A test record that only says “Pass” or “Fail” does not explain what happened.
Adhesive Failure
The adhesive separates at the interface with one of the substrates. Record which interface was involved.
Cohesive Failure
Failure occurs through the adhesive layer itself.
Substrate or Coating Failure
The substrate or one of its surface layers fails. For example, adhesive may remain bonded to a painted surface while the paint separates from the material beneath it.
Slip or Early Movement
This is especially relevant to initial-grab testing. Record:
- Direction of movement
- Amount of movement where measurable
- Partial separation
- Need for support
Mixed Failure
Some specimens may show more than one failure mode. Record the combination rather than forcing the result into one category.
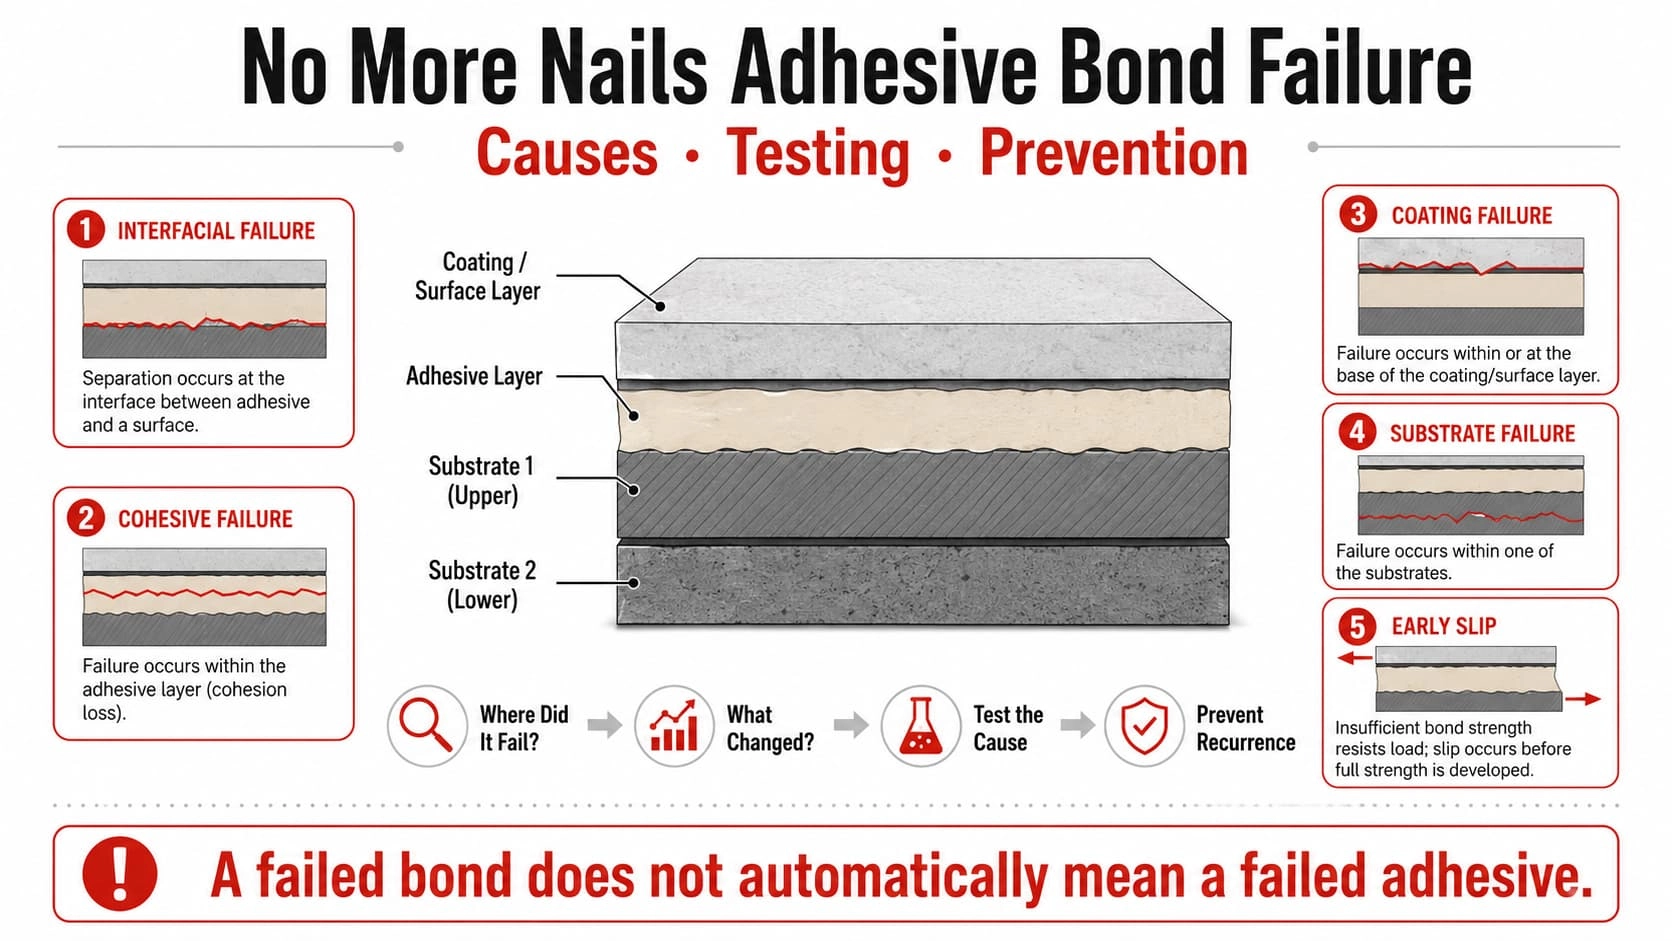
A pass/fail label is not enough to interpret an adhesive test. Record where the failure occurred—at the adhesive interface, within the adhesive, within the substrate or coating, or through early slip—because the failure mode helps identify what actually limited the bonded assembly.
This guide stops at recording and interpreting the observed failure location. Detailed root-cause diagnosis should be handled as a separate bond-failure analysis.
Laboratory Tests vs Representative Application Tests
Controlled laboratory tests and representative application tests answer different questions. Laboratory methods improve repeatability and comparison, while application tests show whether the adhesive behaves acceptably with the actual substrates, geometry, orientation, and installation process.
Controlled Laboratory Testing
Controlled methods are useful when buyers need:
- Repeatable specimen preparation
- Comparable sample geometry
- Controlled conditioning
- Comparable loading conditions
- Numerical or standardized comparison
Representative Application Testing
An application-representative test can use:
- Actual project substrates
- Realistic bead geometry
- Actual installation orientation
- Realistic component size
- Installation-relevant support and handling
This answers a different question: Will this adhesive behave acceptably in the intended installation?
One Does Not Automatically Replace the Other
A standardized mechanical test does not guarantee field performance. A representative field-style sample does not automatically provide standardized comparative strength data. Use each method for the question it is designed to answer.
Use Test Standards Only When Their Scope Matches the Question
ASTM and ISO methods can improve consistency when their scope matches the adhesive, substrates, joint design, and property being evaluated. They should not be added simply to make a specification sound more technical.
ISO 4587:2003
ISO 4587:2003 specifies a method for determining tensile lap-shear strength of rigid-to-rigid bonded assemblies using standard specimens under specified preparation and testing conditions. It may be useful for an appropriate lap-shear evaluation, but it is not a universal open-time or initial-grab method.
ASTM D905-08(2021)
ASTM D905-08(2021) covers comparative shear-strength testing of adhesive bonds used primarily for wood and similar materials under compression loading. The measured result can be influenced by wood strength, specimen design, loading, and other factors, so it should not be treated as a universal measure of No More Nails performance.
ASTM D3498-19a
ASTM D3498-19a has a specific scope covering gap-filling construction adhesives used to bond plywood or OSB structural panels to wood-based floor-system framing. It should only be referenced where that application and scope are relevant.
A recognized standard should be used only when its scope matches the adhesive, substrate, joint type, and property being evaluated. A lap-shear, wood-bond, or structural-panel standard should not automatically be relabeled as an open-time or initial-grab test.
How Should Private-Label Buyers Use the Test Results?
The purpose of testing is not simply to create a laboratory report. For private-label and sourcing projects, the results should help create a repeatable approval basis.
Test → Define Acceptance Criteria → Approve Sample → Preserve the Test Basis
Convert Observations Into Acceptance Criteria
Avoid vague approval statements such as “good grab.” A more useful requirement describes what must happen under the agreed test conditions.
For example: No unacceptable slip under the agreed specimen, load, orientation, and observation period.
Similarly, instead of “long enough open time,” define whether assemblies prepared at the agreed delay still meet the approved post-conditioning criterion. Actual thresholds must come from the approved product or project requirement.
Keep the Test Method With the Approved Result
The record should preserve:
- Product / sample identification
- Batch where available
- Substrates
- Surface preparation
- Adhesive application
- Test environment
- Timing
- Evaluation method
- Acceptance criterion
- Result
- Failure mode
Use the Same Basis for Later Comparison
If a later sample or repeat production is evaluated, using the same approved test basis makes the comparison more meaningful. This does not mean every project needs the same universal test method. It means one approved project should preserve a repeatable comparison basis.
Private-label buyers should not approve a sample from a result alone. The approved record should include the tested product, substrates, preparation, method, environment, timing, acceptance criteria, result, and failure mode so the same basis can be used for later comparison or repeat validation.
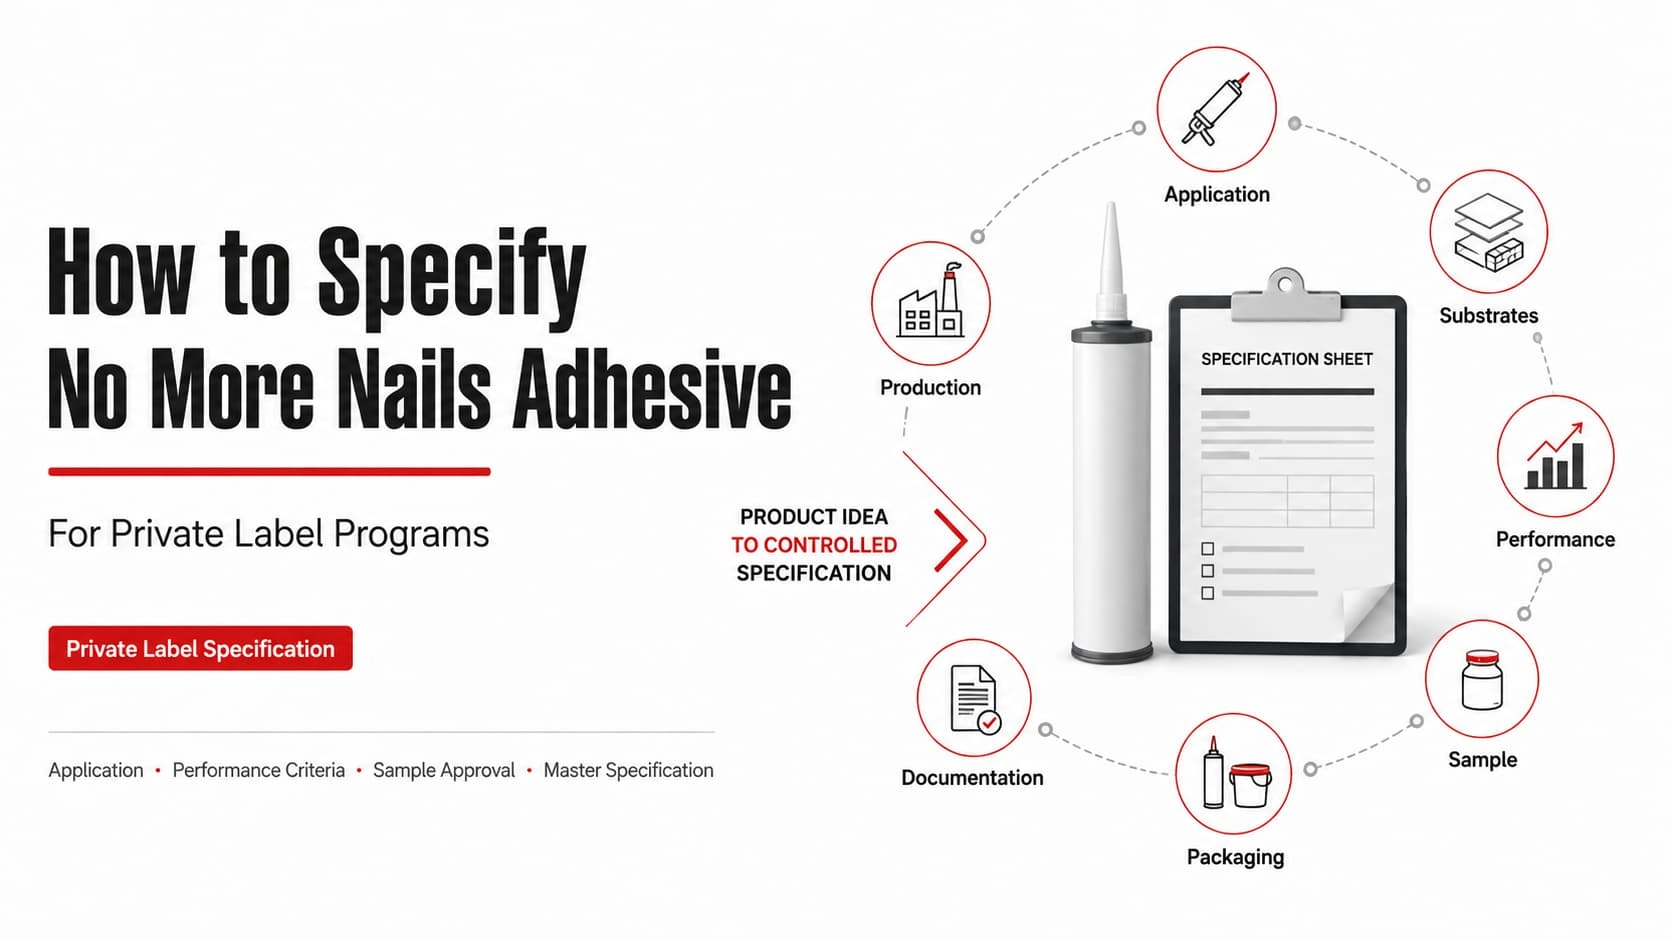
Once testing has established the appropriate product route and acceptance criteria, the results can be transferred into the project's formal specification. For the next stage, see How to Specify No More Nails Adhesive for Private Label Programs.
Evaluating a KINGDELI No More Nails Sample
If you are evaluating a KINGDELI No More Nails adhesive, prepare the application information before moving into product-level technical discussion.
Useful information includes:
- Substrate A and Substrate B
- Coatings or surface finishes
- Surface preparation
- Application orientation
- Expected assembly or positioning window
- Early holding requirement
- Temporary-support limitations
- Intended conditioning environment
- The property that will determine sample acceptance
The exact product grade, test method, and acceptance criteria should be confirmed for the individual project rather than inferred from generic No More Nails data.
The testing framework in this guide is a practical buyer-validation approach. It should not be interpreted as a claim that every KINGDELI product is tested using one universal internal SOP.
Common Adhesive Testing Mistakes
Using One Published Cure Time for Every Grade
Different products may use different formulations and cure mechanisms. Use the technical data for the exact grade and validate it under representative conditions.
Treating Initial Grab as Final Strength
Early holding behavior and developed bond performance answer different questions. Test them separately.
Changing Substrates Between Samples
A product comparison is difficult to interpret if Sample A and Sample B are tested on different substrate systems.
Ignoring Temperature and Humidity
Environmental conditions can change application and cure behavior. Record them.
Using Different Bead Sizes or Bond Areas
Different adhesive geometry can change both early holding and cure behavior. Make the application repeatable.
Reporting “Pass” Without Failure Mode
A pass/fail result does not reveal what limited the specimen. Record the actual failure location or movement.
Comparing Different Test Methods as If They Were Equivalent
A vertical-slip observation, lap-shear result, and wood compression-shear value are not interchangeable measurements. Each method answers a different question.
A Practical Buyer Test Sequence
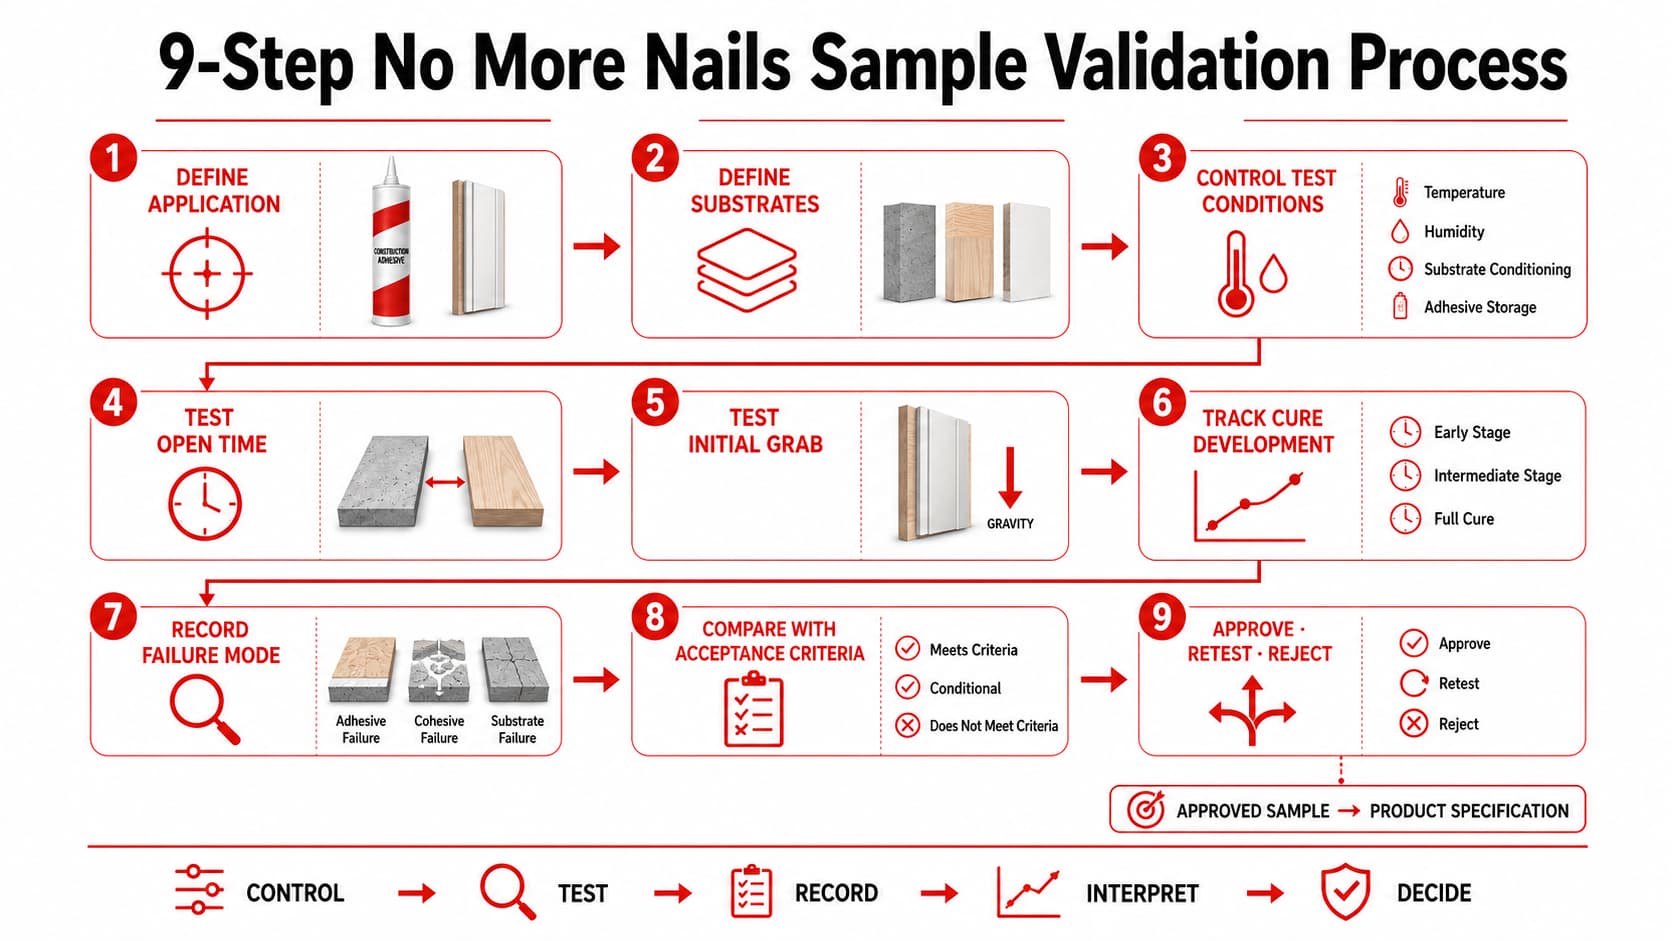
A repeatable validation program can be organized into nine steps.
- Identify the Application — Define what is being bonded and how the assembly will be installed.
- Define the Substrates and Surface Preparation — Record the real materials, coatings, and preparation method.
- Set the Controlled Test Conditions — Define adhesive geometry, environment, orientation, assembly method, and conditioning.
- Run the Open-Time Series — Change the assembly delay while keeping the other important variables constant.
- Run the Representative Initial-Grab Test — Reproduce the early holding challenge and measure movement or support requirement.
- Track Cure Development — Use equivalent specimens and defined conditioning checkpoints.
- Record Failure Modes — Document what actually separated, moved, or failed.
- Compare Results With Acceptance Criteria — Read open time, grab, and cure together.
- Approve, Reject, or Retest — If the result or method is not acceptable, retesting may be more appropriate than drawing a final conclusion.
A practical buyer validation sequence is: define the application → control the substrates and test conditions → test open time → test initial grab → track cure development → record failure mode → compare the results with predefined acceptance criteria → approve, reject, or retest the sample.
No More Nails Adhesive Testing Record Template
The following structure can be adapted for buyer, supplier, technical, or private-label sample validation. It is a practical record framework, not a claim that every manufacturer uses the same internal procedure.
A. Document Control
| Field | Record |
|---|---|
| Test Record No. | |
| Test Date | |
| Operator / Reviewer | |
| Project / Customer Reference | |
| Product Name / Code | |
| Sample ID | |
| Batch / Lot No. | |
| Supplier / Manufacturer |
B. Substrate and Surface Conditions
| Field | Substrate A | Substrate B |
|---|---|---|
| Material | ||
| Grade / Type | ||
| Surface Finish | ||
| Coating / Paint | ||
| Porous / Non-Porous | ||
| Surface Preparation | ||
| Primer Used |
C. Adhesive Application
| Package / Cartridge Condition | |
| Application Method | |
| Bead Geometry | |
| Applied Amount | |
| Bonded Area | |
| Bond-Line Thickness | |
| Assembly Pressure / Method |
D. Test Environment
| Temperature | |
| Relative Humidity | |
| Conditioning Before Test | |
| Ventilation / Exposure Condition | |
| Other Relevant Environment |
E. Final Sample Evaluation
| Area | Result | Acceptance Status |
|---|---|---|
| Open Time | ||
| Initial Grab | ||
| Cure Development | ||
| Substrate Compatibility | ||
| Failure Mode | ||
| Application Fit |
Final Decision:
- Approved
- Approved with Conditions
- Retest Required
- Rejected
Deviation From Method: ______________________________________
Potential Effect on Result: _______________________________
Any meaningful deviation should be recorded. A comparison is less reliable when one specimen was prepared, conditioned, assembled, or evaluated differently from the others.
FAQ: No More Nails Open Time, Grab, and Cure Testing
How long is the open time of No More Nails adhesive?
There is no universal open time for every No More Nails adhesive. The value depends on the exact product formulation and test or application conditions. Buyers should check the technical data for the specific grade and validate the working window using representative substrates and conditions.
Is initial grab the same as final bond strength?
No. Initial grab describes early holding behavior before full cure, such as resistance to slip or separation during installation. Final bond strength is evaluated after the adhesive has developed under the required conditioning conditions.
How long does No More Nails adhesive take to fully cure?
There is no single full-cure time that applies to all No More Nails products. Cure development can depend on formulation, adhesive thickness, substrate porosity, temperature, humidity, and other application conditions. Buyers should use exact product data and evaluate defined conditioning checkpoints rather than assume one universal time.
How should buyers test initial grab?
Use representative substrates, a defined component or load, consistent bond area and adhesive application, an orientation that reflects the installation, and defined observation checkpoints. Record measurable slip, separation, or temporary-support requirements instead of relying only on descriptions such as “high grab.”
Should buyers test the actual project substrates?
Yes. Representative project substrates are important for final application validation because coatings, porosity, surface preparation, and material combinations can change the result. Controlled laboratory testing can still provide useful comparative data, but it does not automatically replace application-representative testing.
Build a Repeatable Test Method, Not a Universal Number
The purpose of adhesive testing is not to find one universal No More Nails open time, grab strength, or cure time.
The purpose is to determine whether a specific adhesive grade fits a specific installation under clearly defined conditions.
| Property | Decision Question |
|---|---|
| Open Time | Is there enough usable time to assemble the joint correctly? |
| Initial Grab | Does the component remain acceptably positioned before cure develops? |
| Cure Development | Does the bonded assembly develop the required performance over the agreed conditioning period? |
Control the method, record the conditions, test the three properties separately, and approve the adhesive only when the combined result fits the real application.
If the project is already evaluating a KINGDELI No More Nails adhesive, use the test results to move into product-specific sample discussion rather than relying on generic category data.
Discuss Your Adhesive Test Requirements
Prepare the substrate pair, surface condition, installation orientation, required assembly window, early holding requirement, and intended validation conditions. These details help define which product-level information, sample, and acceptance criteria should be evaluated for the project.
If the project moves into private-label development after sample validation, continue with the Private Label No More Nails Adhesive Specification Guide.
Discuss Your Adhesive Test RequirementsView No More Nails Adhesives
No More Nails Adhesive Bond Failure: Causes, Testing, and Prevention
No More Nails vs MS Polymer Adhesive for Panel, Trim, and Furniture Bonding
No More Nails Adhesive Open Time, Grab Strength, and Cure Testing Guide
How to Specify No More Nails Adhesive for Private Label Programs
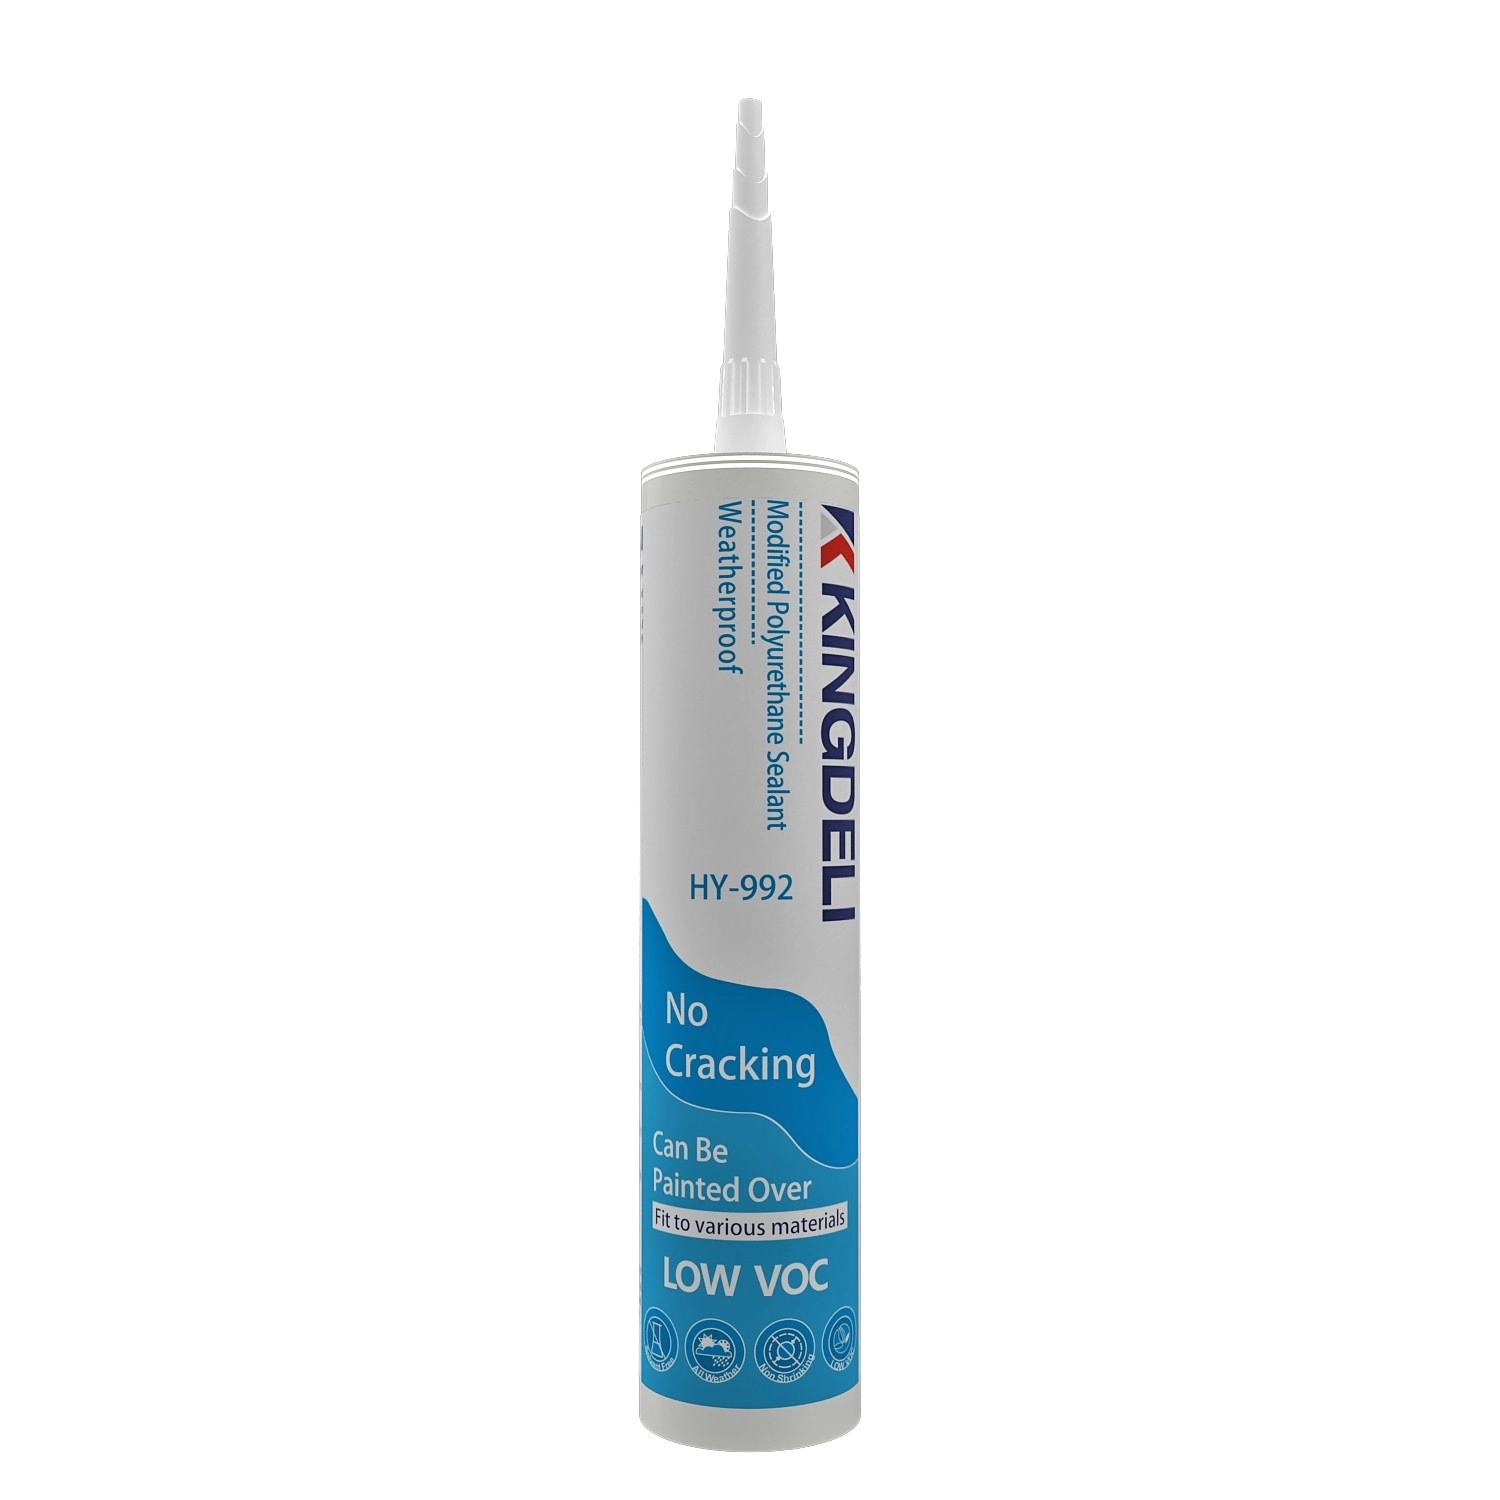
HY992 Modified Polyurethane Construction Sealant
HY992 Modified Polyurethane Sealant is a one-component, moisture-curing construction sealant designed for professional building and structural sealing applications. It provides excellent adhesion, weather resistance, and durable elasticity, making it suitable for a wide range of construction materials.
The formulation delivers strong bonding performance without corrosion or substrate contamination, while maintaining low VOC content for environmentally responsible construction projects.

HY995 Crystal Clear Ms Polymer Adhesive/Sealant
HY995 Crystal Clear Ms Polymer Adhesive/Sealant is a new generation MS Polymer adhesive / sealant formulated for all bonding and sealing applications where long term reliability is required. It has excellent bonding strength on various materials. It will cure to form a durable, flexible, waterproof seal.

HY997 High-Performance Anti-Microbial MS Polymer Sealant
HY997 MS polymer sealant for is is a premium one-component, neutral-curing modified silane sealant engineered for demanding interior applications. It offers a Class 20 movement capability, ensuring long-lasting flexibility and reliable performance under dynamic joint conditions. Curing at room temperature, HY997 delivers superior anti-microbial and mildew-resistant properties, maintaining hygienic and clean environments over time.
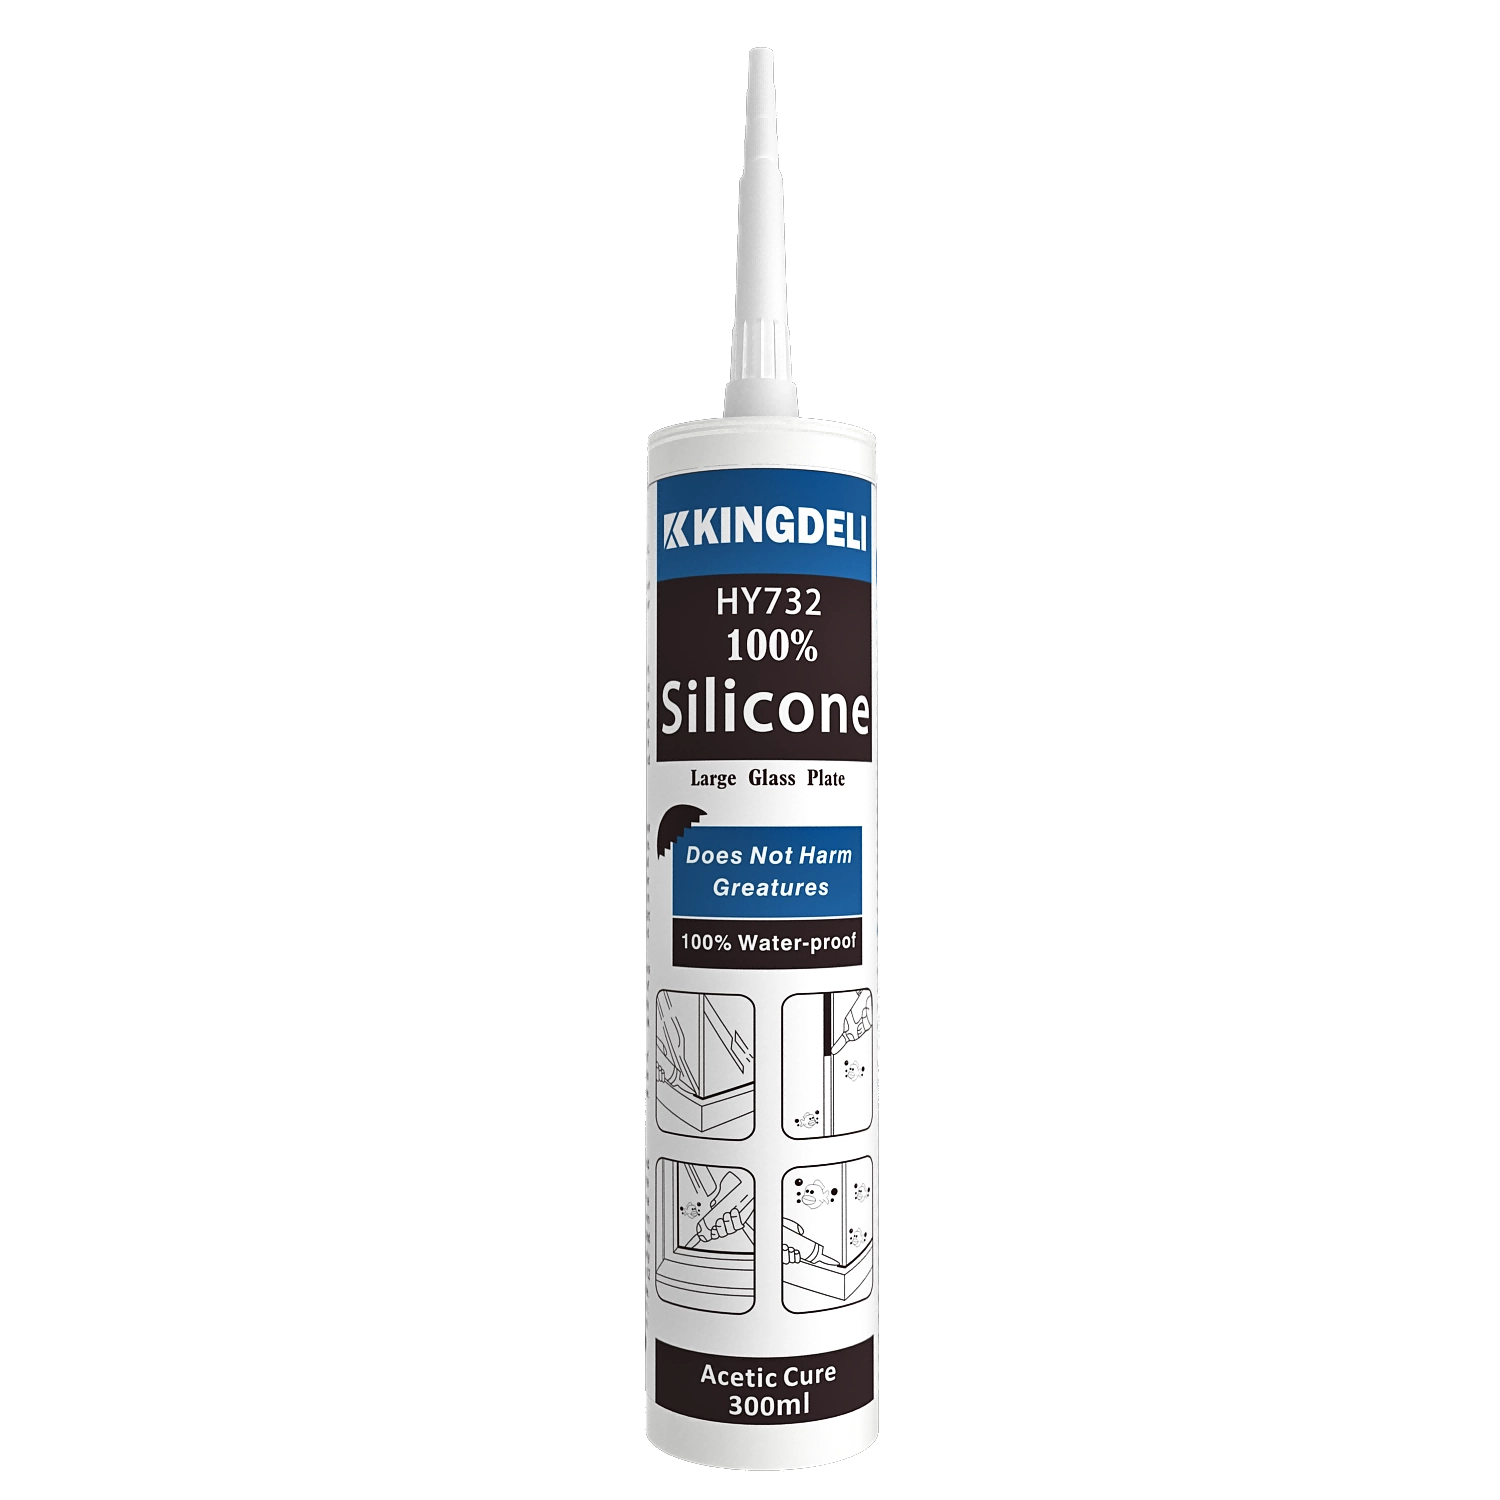
KINGDELI HY732 Professional Acetoxy Cure Silicone Sealant
KINGDELI HY732 is a professional-grade, one-component acetoxy cure silicone sealant designed for fast curing, strong adhesion, and long-lasting flexibility. Ideal for aquariums, glass applications, aluminum doors and windows, kitchens, and bathrooms, it provides reliable sealing performance with excellent anti-fungal protection in high-humidity environments.
Let’s Build Stronger Bonds with Quality Adhesives and Sealants
Have questions about the topic or need tailored sealant solutions for your project?
Our team is ready to provide expert guidance, product recommendations, and application support.
Innovating with Integrity, Bonding the World
Since 1998, KINGDELI has delivered trusted, sustainable sealant solutions that connect industries and inspire progress worldwide.
Whatsapp: +8618825946249
Kingdeli
Kingdeli
Kingdeli
Kingdeli
Kingdeli