


No More Nails Adhesive Bond Failure: Causes, Testing, and Prevention
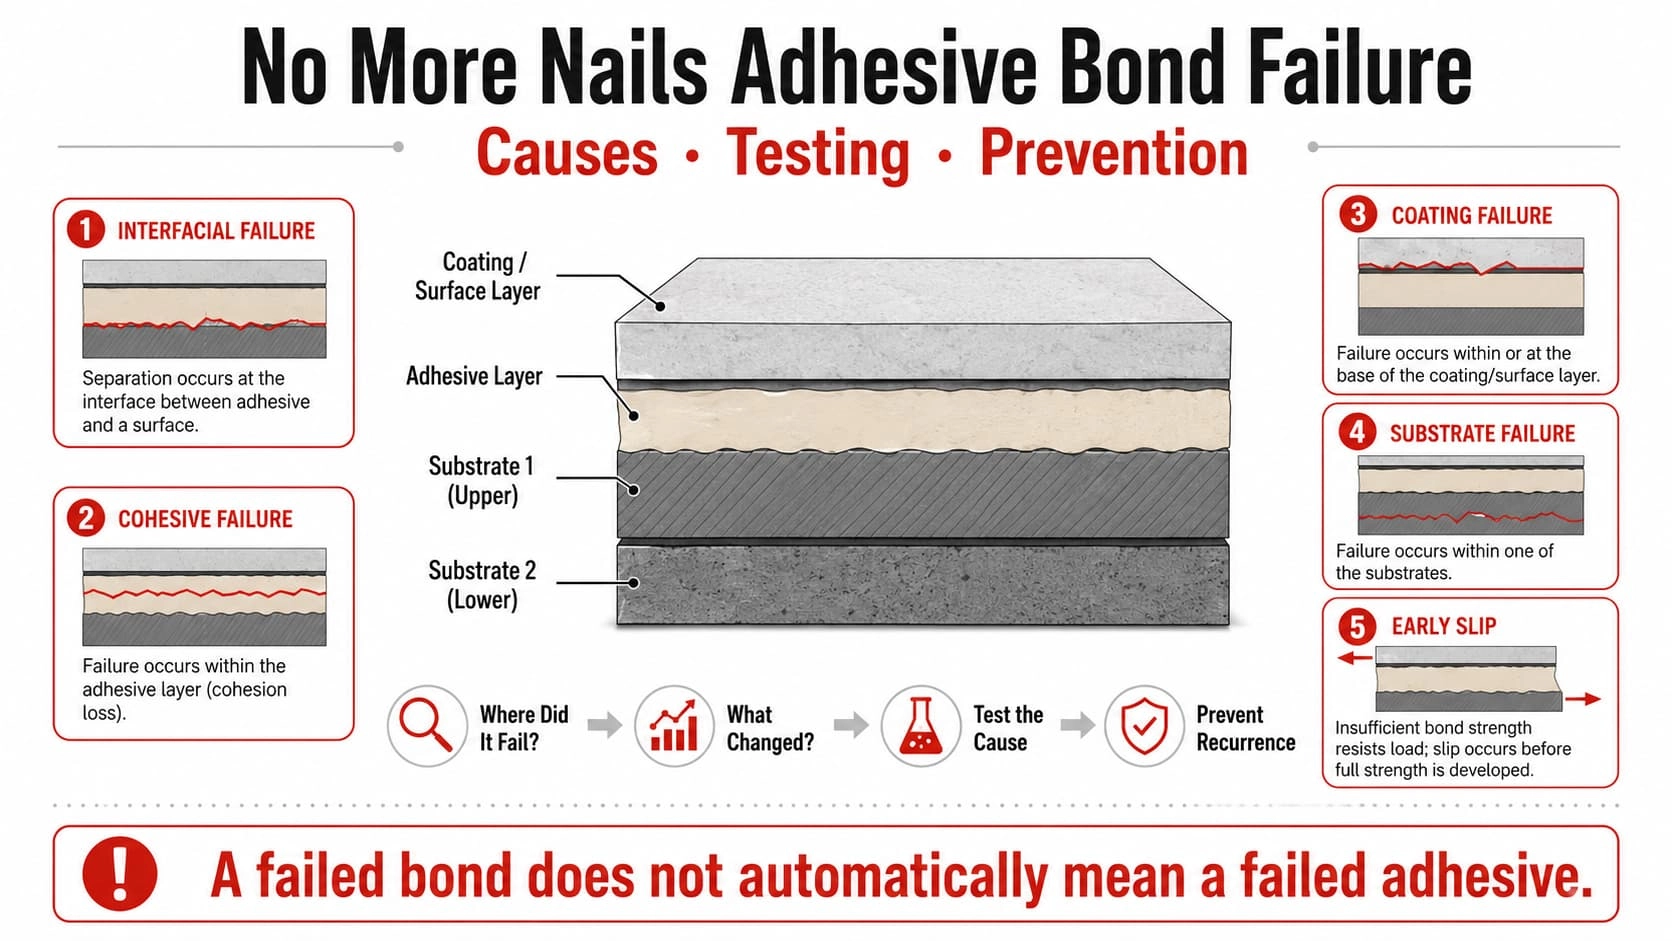
- Why Do No More Nails Adhesive Bonds Fail?
- Do Not Assume the Adhesive Is the Problem
- Bond Failure Is a System Problem
- Start by Identifying the Failure Mode
- Interfacial Failure
- Cohesive Failure Within the Adhesive
- Substrate Failure
- Coating or Paint Failure
- Early Slip or Movement
- Mixed Failure
- Failure Diagnosis Matrix
- 7 Common Causes of No More Nails Bond Failure
- 1. Surface Contamination or Inadequate Preparation
- 2. Weak Paint, Coating, or Surface Layer
- 3. Poor Wet-Out or a Difficult Substrate Surface
- 4. Inconsistent Adhesive Application or Insufficient Contact
- 5. Open-Time or Assembly-Process Error
- 6. Incomplete Cure or Early Loading
- 7. Joint Design, Movement, Load, or Environmental Mismatch
- What the Failure Surface Can Tell You
- Can Open Time, Grab, or Cure Conditions Contribute to Failure?
- How Joint Design and Loading Affect the Bond
- Shear and Peel-Type Loading Are Different Challenges
- Movement Between Dissimilar Materials
- Bond Area and Geometry
- Environmental Exposure
- How to Diagnose Bond Failure With Controlled Testing
- Compare Failed and Successful Assemblies
- Change One Main Variable at a Time
- Use Repeat Specimens
- Record the Failure Mode After Every Retest
- A 6-Step Bond-Failure Troubleshooting Process
- Step 1 — Document the Failed Assembly
- Step 2 — Classify the Failure Mode
- Step 3 — Identify What Changed
- Step 4 — Form a Testable Hypothesis
- Step 5 — Change One Main Variable and Retest
- Step 6 — Confirm the Corrective Action and Revalidate
- How to Prevent the Same Bond Failure From Happening Again
- Before Bonding
- During Adhesive Application
- During Assembly
- During Cure Development
- Before Sample Approval
- During Repeat Validation
- What Importers and Private-Label Buyers Should Record
- When Should You Reconsider the Adhesive Grade?
- Process Problem
- Product-Fit Problem
- Evaluating a KINGDELI No More Nails Failure Case
- Common Bond-Failure Troubleshooting Mistakes
- Assuming Every Failure Is an Adhesive Defect
- Changing Several Variables at the Same Time
- Calling Coating Failure an Adhesive Failure
- Judging Only by Initial Grab
- Retesting Without Recording the Original Failure Mode
- Changing the Adhesive Before Confirming the Failure Cause
- Treating One Successful Retest as Proof
- FAQ: No More Nails Adhesive Bond Failure
- Why is my No More Nails adhesive not sticking?
- Does adhesive peeling off a painted wall mean the adhesive failed?
- What is the difference between interfacial failure and cohesive failure?
- Can insufficient cure cause a construction adhesive bond to fail?
- Should I change adhesive after a bond failure?
- Diagnose the Failure Before Changing the Adhesive
- Discuss Your Bonding Application or Failure Case
A failed No More Nails adhesive bond does not automatically mean the adhesive itself failed.
A bonded assembly is a system made up of the adhesive, both substrates, any paint or coating between them, the surface preparation, the application method, the cure conditions, the joint geometry, and the loads or environmental conditions applied to the finished bond.
Failure can occur at any of these points.
Quick Answer
The most useful way to troubleshoot a No More Nails bond failure is to identify where the bonded assembly failed, determine which possible causes fit that failure mode, and then test the suspected cause through controlled comparison. A failed bond does not automatically prove that the adhesive product itself is defective.
Do not start with: “Why is the adhesive bad?”
Start with: “Where did the bonded assembly fail, what possible causes fit that failure mode, and how can the suspected cause be confirmed?”
Observe → Classify → Isolate → Confirm → Correct → Revalidate
Start with where the bond failed, not with the assumption that the adhesive failed.
Why Do No More Nails Adhesive Bonds Fail?
No More Nails adhesive bonds can fail because of the adhesive–substrate interface, surface contamination, weak coatings, poor contact or wet-out, inconsistent application, unsuitable assembly timing, insufficient cure development, joint loading, environmental exposure, or a mismatch between the exact adhesive grade and the application.
A component may detach because:
- The adhesive released from one substrate interface.
- The adhesive remained attached but paint or coating separated from the base material.
- The adhesive tore within its own layer.
- The substrate itself fractured.
- The component slipped before enough early holding developed.
- The joint was moved or loaded before sufficient performance developed.
- The bonded system experienced movement, load, or environmental conditions for which the selected product had not been adequately validated.
Do Not Assume the Adhesive Is the Problem
A detached component only proves that the bonded system no longer remained intact. It does not identify which layer or process caused the failure.
Before changing products, examine:
- Where the adhesive remains
- Which surface appears relatively clean
- Whether paint or coating has detached
- Whether the substrate has torn
- Whether the adhesive layer itself has split
- Whether early movement occurred
- Whether failure happened immediately or after conditioning, loading, or exposure
Bond Failure Is a System Problem
Substrate A → Surface Layer → Adhesive → Surface Layer → Substrate B
The complete assembly can also be affected by:
- Surface preparation
- Adhesive application
- Assembly pressure
- Bond-line geometry
- Positioning and support
- Cure development
- Applied load
- Movement
- Temperature
- Moisture or other exposure conditions
Start by Identifying the Failure Mode
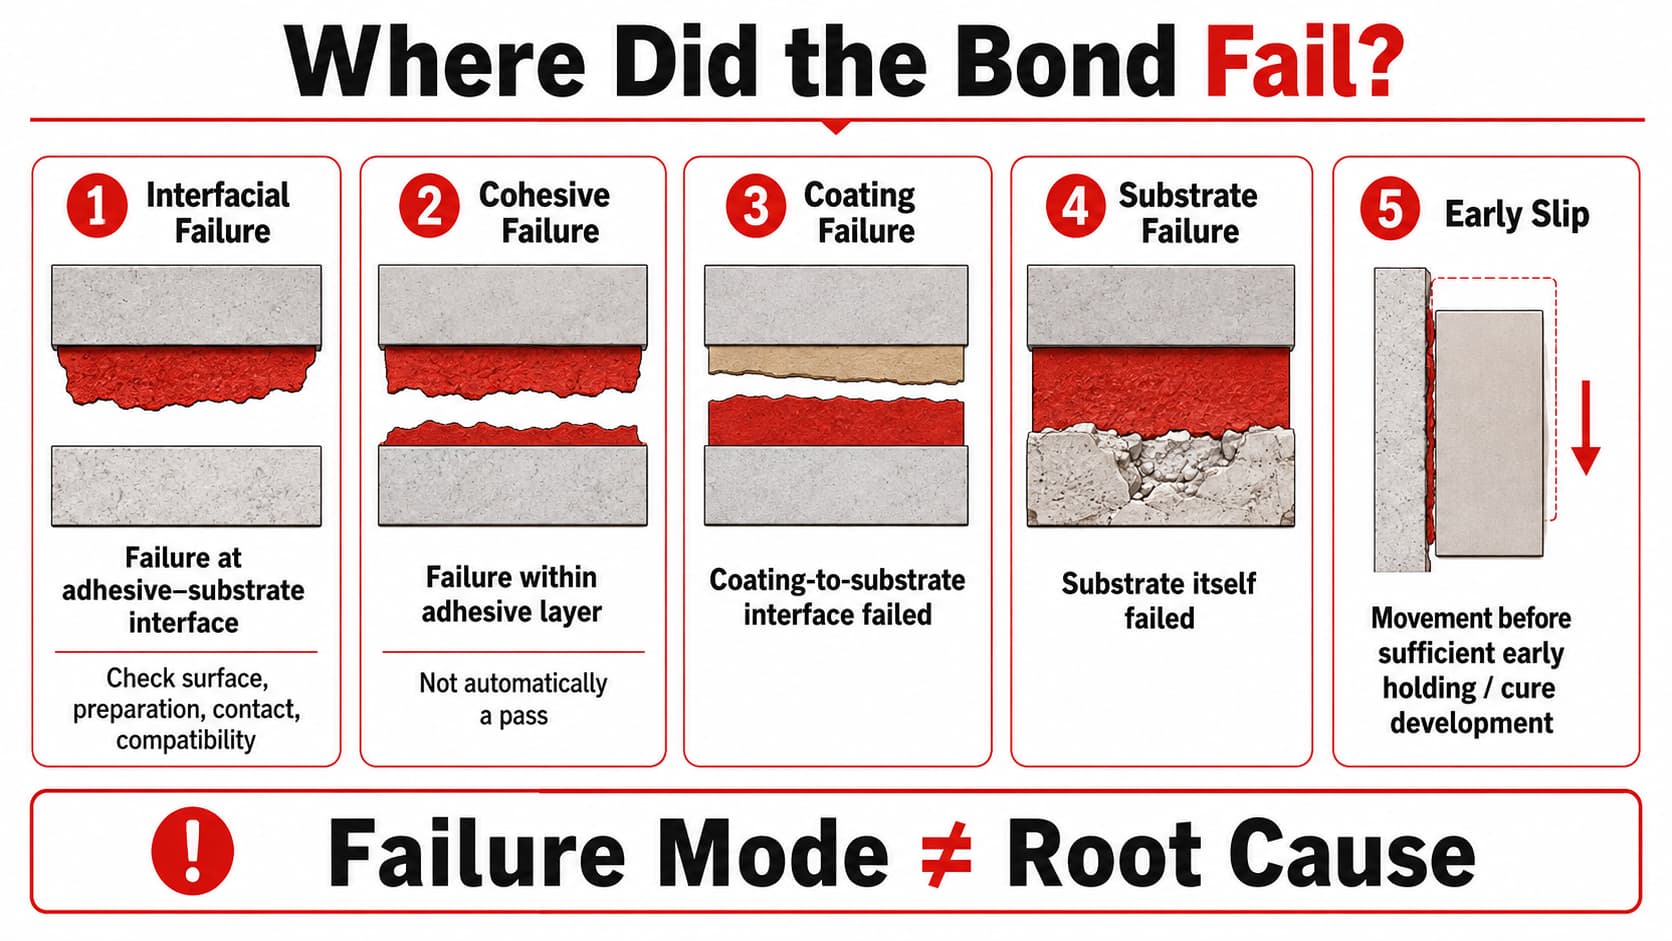
The first step in adhesive failure analysis is to determine where the joint separated. Adhesive left on both substrates, adhesive released from one surface, coating pulled away from the base material, substrate breakage, and early slip represent different failure modes and should lead to different diagnostic checks.
Interfacial Failure
Interfacial failure occurs when the adhesive separates at one of the bonded surfaces. One substrate may appear relatively clean while the adhesive remains mainly on the other side.
This pattern should lead to questions such as:
- Was the failed surface contaminated?
- Was surface preparation consistent?
- Did the adhesive make adequate contact with the actual surface?
- Was the substrate coated or treated?
- Was the exact adhesive grade validated for that material?
- Did application or assembly conditions interfere with contact?
Interfacial failure is evidence about where separation occurred. It is not, by itself, proof of why it occurred.
Cohesive Failure Within the Adhesive
Cohesive failure occurs when the adhesive layer tears internally and adhesive remains on both bonded surfaces.
Cohesive failure does not automatically mean the product passed the application requirement.
The result can still be influenced by:
- Applied load
- Bond-line geometry
- Cure state
- Adhesive layer thickness
- Environmental exposure
- The performance level required by the application
The appropriate conclusion is limited: under that test condition, the adhesive–substrate interface was not the only or necessarily the weakest failure location.
Substrate Failure
Sometimes the substrate itself tears, fractures, or breaks before the adhesive interface releases. This can occur in weak porous surfaces, fiber-based boards, plaster-like materials, or damaged substrate regions.
In this situation, the substrate may be limiting the assembly. Record the observation as substrate failure rather than automatically describing it as poor adhesive performance.
Coating or Paint Failure
A coating creates another interface within the bonded system.
Adhesive remains attached to paint
while paint separates from the wall or base material.
In this case, the observed failure occurred within the coating system rather than directly at the adhesive-to-paint interface. The next question is: How well was the coating itself bonded to the underlying substrate?
Early Slip or Movement
Possible observations include:
- Downward sliding
- Rotation
- One edge opening
- Gradual displacement
- Need for temporary support
- Separation after the component was disturbed
This is an installation-stage observation and should not be confused with developed bond performance. If open time, initial grab, or cure development is the main technical question, use the No More Nails Adhesive Open Time, Grab Strength, and Cure Testing Guide.
Mixed Failure
A specimen may show partial interfacial failure, partial cohesive tearing, local coating removal, and substrate damage in different areas. Record the combination rather than forcing a mixed failure into a single category.
Failure Diagnosis Matrix
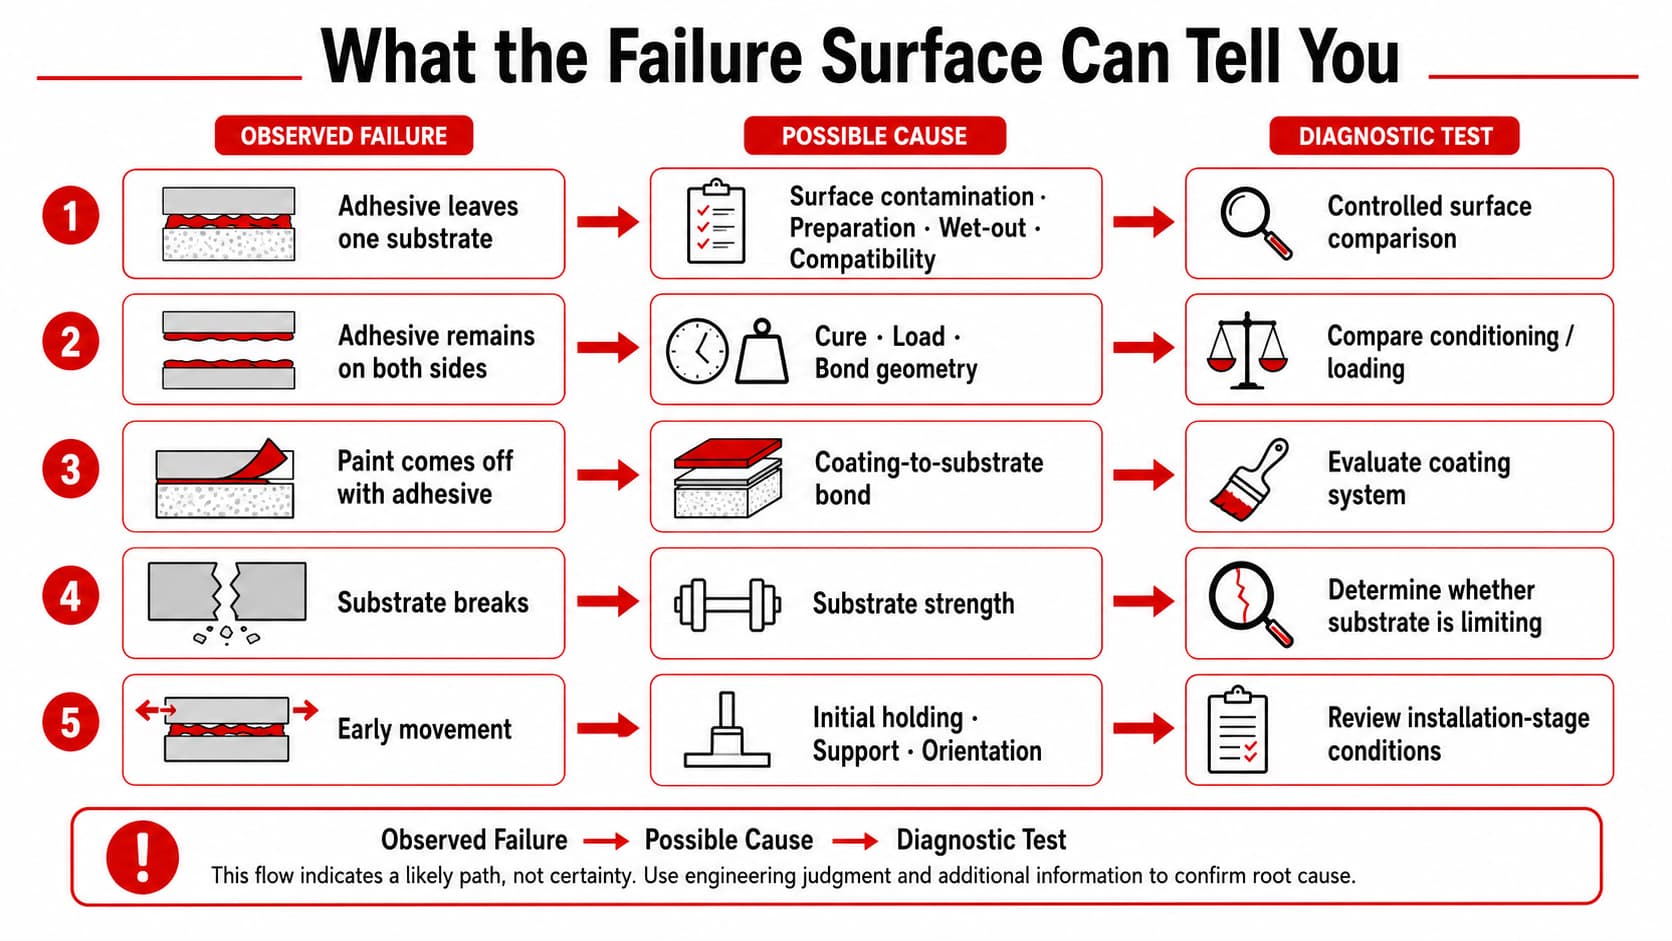
The failure surface provides clues, but those clues should be treated as diagnostic hypotheses rather than confirmed root causes.
| Observed Failure | Possible Causes to Investigate | First Check | Diagnostic Direction |
|---|---|---|---|
| Adhesive leaves one substrate interface | Contamination, preparation, compatibility, poor wet-out or contact | Inspect the failed interface | Repeat with controlled surface preparation |
| Adhesive remains on both substrates but tears internally | Adhesive layer, load, cure state, bond geometry | Inspect adhesive residue | Compare conditioning and loading conditions |
| Paint or coating comes off with adhesive | Weak coating adhesion | Inspect coating-to-base interface | Evaluate the coating system separately |
| Substrate tears or breaks | Weak substrate region | Inspect substrate fracture | Determine whether the substrate limits the assembly |
| Component slips shortly after assembly | Early holding, orientation, support, application geometry | Review early movement | Check initial-grab and support conditions |
| Joint separates before sufficient performance develops | Early loading, movement, cure environment, geometry | Compare timing and conditioning | Evaluate cure-development history |
| Bond works on one material but fails on another | Compatibility or surface-condition difference | Isolate the changed substrate | Run a controlled substrate comparison |
| Same adhesive works on one panel batch but not another | Surface, coating, or material variability | Compare substrate specifications | Isolate the material change |
| Failure follows moisture or temperature exposure | Environment, movement, substrate change, product suitability | Compare exposed and control assemblies | Revalidate environmental suitability |
| Repeat tests vary significantly | Uncontrolled process variables | Review test records | Standardize the process before judging the product |
| Only edges peel while the center remains bonded | Peel stress, edge loading, geometry, movement | Inspect load direction | Evaluate joint design |
| Adhesive remains bonded but a surface layer detaches | Coating or substrate weakness | Identify the fracture plane | Test the surface system separately |
Possible causes are hypotheses, not confirmed root causes.
7 Common Causes of No More Nails Bond Failure
1. Surface Contamination or Inadequate Preparation
Adhesives need effective contact with the actual bonding surface. Contamination can interfere with that contact.
Possible contaminants or weak surface conditions include:
- Dust
- Oil
- Grease
- Loose particles
- Release agents
- Rust or oxide
- Weak surface deposits
- Residues from manufacturing or cleaning processes
If interfacial failure occurs, surface cleanliness and preparation should be investigated before concluding that the adhesive itself is defective. A useful question is: Did the adhesive contact the actual substrate, or did it primarily contact contamination or a weak surface layer?
2. Weak Paint, Coating, or Surface Layer
The adhesive may bond to a coating while the coating itself is poorly attached to the underlying material.
Evaluate the complete surface system, not only the adhesive-to-surface contact.
When a coating is involved, record whether separation occurred at the adhesive-to-coating interface, within the coating, at the coating-to-base interface, or within the substrate.
3. Poor Wet-Out or a Difficult Substrate Surface
Successful bonding requires adequate contact between the adhesive and the real surface.
Poor contact can be influenced by:
- Surface chemistry
- Contamination
- Texture
- Coatings
- Surface treatments
- The exact adhesive formulation
- Application pressure or geometry
The useful diagnostic question is: Does this exact adhesive grade make adequate contact with this actual surface under the intended application conditions?
4. Inconsistent Adhesive Application or Insufficient Contact
Relevant variables may include:
- Bead pattern
- Adhesive amount
- Bonded area
- Bond-line thickness
- Assembly pressure
- Surface flatness
- Local gaps
- Positioning
The troubleshooting goal is to determine whether the failed assembly was prepared in the same way as the successful or approved reference. There is no universal bead size or bond-line thickness that should be assumed for every application.
5. Open-Time or Assembly-Process Error
The interval between adhesive application and assembly may affect the resulting joint.
Check:
- Actual application-to-assembly delay
- Whether the delay changed between successful and failed assemblies
- Whether temperature or substrate condition changed
- Whether assembly remained within the product-specific working window
Do not apply one generic No More Nails open-time value to every grade. For detailed validation, refer to the Open Time, Grab Strength, and Cure Testing Guide.
6. Incomplete Cure or Early Loading
Check whether:
- The assembly was disturbed shortly after bonding
- Temporary support changed
- Load was introduced earlier than in the successful reference
- Conditioning conditions differed
- Bond-line geometry changed
This section is diagnostic, not a substitute for cure-development testing. If cure behavior needs to be measured, use the No More Nails adhesive testing guide.
7. Joint Design, Movement, Load, or Environmental Mismatch
Relevant demands may include:
- Shear-type loading
- Tensile loading
- Peel or edge lifting
- Cleavage-type loading
- Vibration
- Repeated movement
- Movement between different materials
- Moisture
- Temperature variation
- Other application-specific exposure
The exact adhesive grade should therefore be evaluated against the real joint and use conditions, not only against a generic substrate list.
What the Failure Surface Can Tell You
A technical failure description should identify what remains on each side after separation:
- Adhesive residue on Substrate A
- Adhesive residue on Substrate B
- Coating attached to the adhesive
- Exposed base substrate
- Torn substrate fibers
- Damaged plaster
- Internal adhesive tearing
- Edge peel
- Evidence of early movement
Weak description: “The component fell off the painted wall.”
Useful description: “Adhesive remained attached to the detached paint film while the underlying wall surface was exposed.”
A photograph can help preserve the evidence, but the important step is identifying the actual failure location.
Can Open Time, Grab, or Cure Conditions Contribute to Failure?
Yes. Installation timing and cure conditions can contribute to bond failure, but open time, initial grab, and cure development describe different stages of performance.
A joint that:
- Is assembled after an unsuitable delay
- Slips shortly after installation
- Is moved before enough performance develops
- Is loaded too early
may require different corrective actions. Use the failure history to identify which stage should be investigated, then move to the No More Nails Adhesive Open Time, Grab Strength, and Cure Testing Guide where measurement is required.
How Joint Design and Loading Affect the Bond
Shear and Peel-Type Loading Are Different Challenges
Load may be distributed over a broad bonded area or concentrated at an edge. Edge lifting or peel-type loading creates a different challenge from a load spread more evenly across the joint. A result from one specimen geometry should therefore not automatically be transferred to a different joint design.
Movement Between Dissimilar Materials
Different materials can respond differently to:
- Temperature
- Moisture
- Mechanical movement
- Installation loads
When bonded materials move differently, additional stress may develop within the bonded system.
Bond Area and Geometry
Changing:
- Bonded area
- Joint shape
- Edge condition
- Adhesive thickness
- Component size
changes the system being evaluated. A large component with more leverage is not necessarily comparable to a small specimen simply because both use the same substrate pair.
Environmental Exposure
Possible variables include:
- Moisture
- Temperature change
- Outdoor conditions where relevant
- Vibration
- Cleaning or process exposure where applicable
The intended environment should be part of representative validation and product selection.
How to Diagnose Bond Failure With Controlled Testing
Diagnostic testing should change one suspected variable at a time while keeping the other important bonding conditions as consistent as practical.
If several variables change together, an improved or failed result cannot be confidently linked to one cause.
Compare Failed and Successful Assemblies
Where possible, compare the failed assembly with:
- A successful assembly
- An approved sample
- The documented bonding process
Check whether anything changed in:
- Substrate
- Coating
- Material batch
- Surface preparation
- Adhesive sample
- Application method
- Bead geometry
- Assembly delay
- Pressure
- Support
- Conditioning
- Load
- Environment
A changed variable is a useful diagnostic lead. It is not proof of causation.
Change One Main Variable at a Time
Suppose surface preparation is suspected. A useful comparison could be:
| Condition | Test Basis |
|---|---|
| Condition A | Original surface preparation |
| Condition B | Controlled alternative preparation |
Keep the following as consistent as practical:
- Substrates
- Adhesive
- Application
- Assembly method
- Geometry
- Conditioning
Use Repeat Specimens
One improved specimen provides useful evidence, but it should not automatically be treated as final proof of root cause. Where practical, repeat comparable specimens. Consistent results increase confidence that the suspected variable is relevant.
Record the Failure Mode After Every Retest
Do not record only “Test B was stronger.” Also ask:
- Did the failure location change?
- Did interfacial failure become cohesive failure?
- Did the coating still detach?
- Did early slip disappear?
- Did specimen variability decrease?
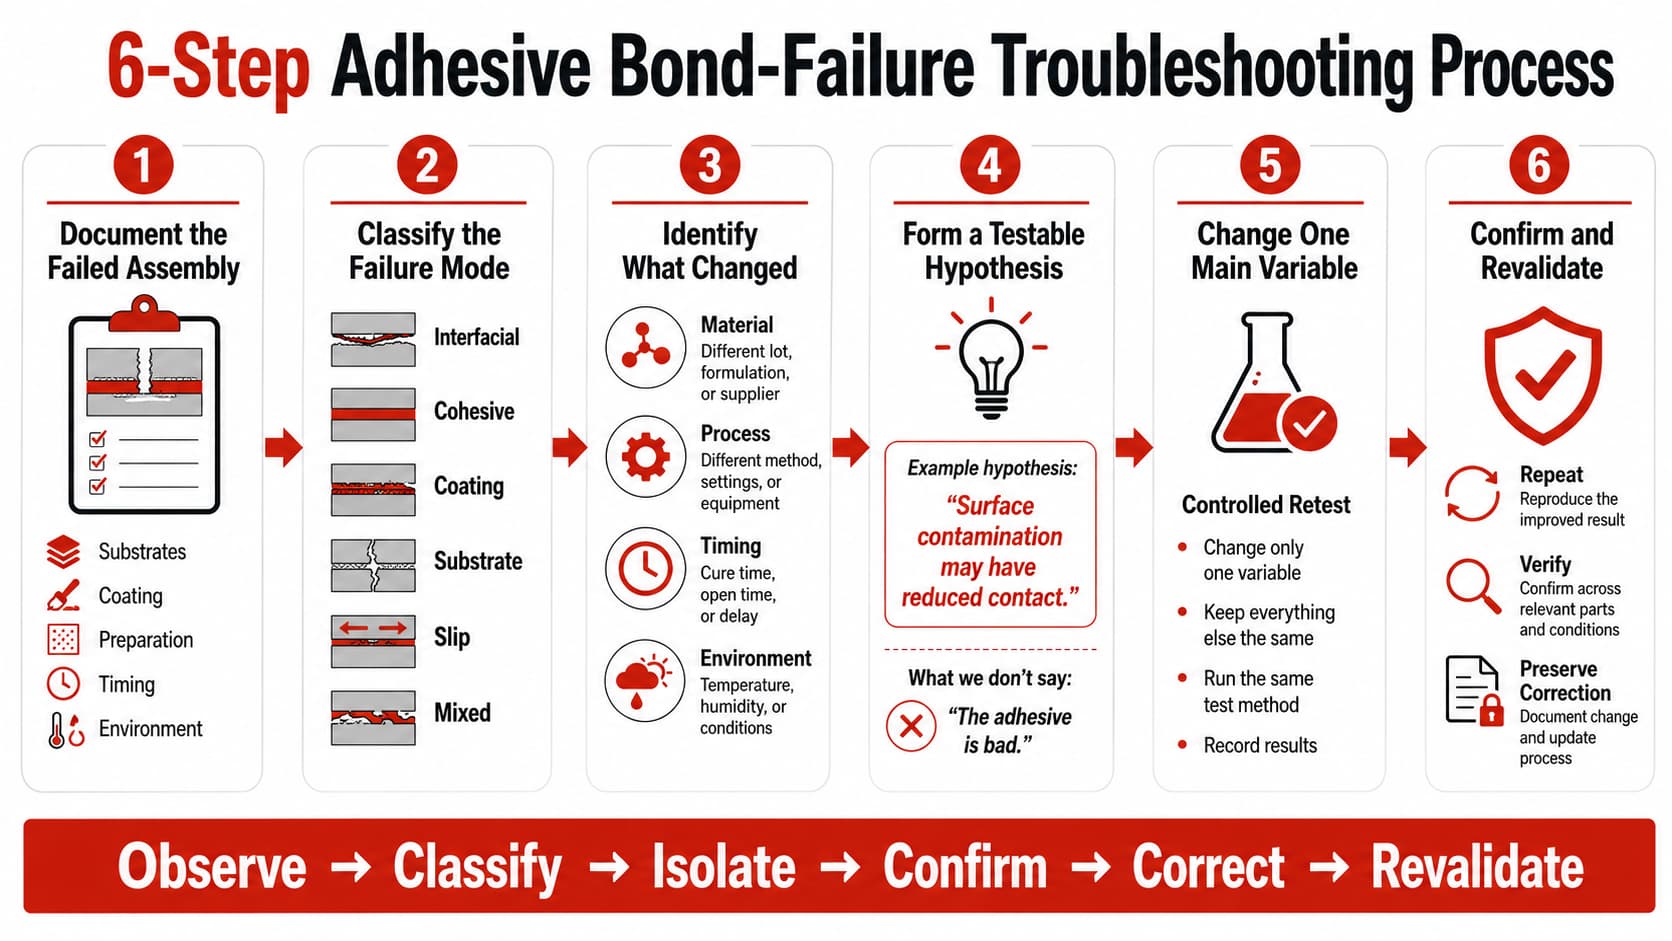
A 6-Step Bond-Failure Troubleshooting Process
A practical troubleshooting process moves from documenting the failed assembly to testing a specific hypothesis and revalidating the corrective action.
Step 1 — Document the Failed Assembly
Before changing the adhesive or repeating the installation, document the failed assembly. Record the substrates, coatings or surface finishes, preparation, application, assembly timing, support method, conditioning environment, loading history, and failure location.
A useful record can include:
- Product or sample identification
- Substrate A
- Substrate B
- Coating or finish
- Surface preparation
- Application method
- Assembly timing
- Support method
- Conditioning
- Load or exposure history
- Observed failure mode
Step 2 — Classify the Failure Mode
Classify where the joint separated before assigning a cause. Distinguish interfacial failure, cohesive failure within the adhesive, substrate failure, coating failure, early slip, and mixed failure.
Failure Mode ≠ Root Cause
Step 3 — Identify What Changed
Compare the failed assembly with a successful reference or approved process and identify what changed.
Check the substrate, coating, preparation, adhesive sample or batch, bead geometry, assembly delay, pressure, support, conditioning, load, and environment.
A changed variable is a diagnostic lead, not proof of causation.
Step 4 — Form a Testable Hypothesis
Convert observations into a testable hypothesis rather than a conclusion.
Testable: “Surface contamination may have reduced adhesive contact.”
Too broad: “The adhesive is defective.”
Testable: “The paint-to-wall interface may be weaker than the adhesive-to-paint interface.”
Too broad: “The wall is bad.”
Step 5 — Change One Main Variable and Retest
Retest by changing one suspected variable while keeping the other important conditions consistent.
Possible variables to isolate include:
- Surface preparation
- Substrate batch
- Coating
- Assembly delay
- Support
- Conditioning
- Adhesive grade where justified
Do not change all of them at once if the objective is root-cause diagnosis.
Step 6 — Confirm the Corrective Action and Revalidate
Do not treat one improved specimen as final proof. Repeat the comparison where practical and confirm that the corrective action produces consistent results under representative conditions.
The objective is not simply to make one sample stick. The objective is to create a repeatable, evidence-based process that reduces the chance of the same failure recurring.
How to Prevent the Same Bond Failure From Happening Again
Preventing repeat bond failure requires control of the complete bonding process, not just changing the adhesive.
Before Bonding
- Confirm the actual substrate pair
- Identify coatings or surface finishes
- Confirm compatibility of the exact product grade
- Check surface cleanliness
- Define required preparation
- Review relevant product documentation
During Adhesive Application
- Adhesive condition
- Application method
- Bead or contact pattern
- Bonded area
- Product-specific working window
- Application-to-assembly timing
During Assembly
- Alignment
- Contact
- Assembly pressure
- Orientation
- Support where required
- Unnecessary movement
During Cure Development
- Movement
- Handling
- Early load
- Conditioning environment
- Support removal
Before Sample Approval
Approval should use representative:
- Substrates
- Coatings
- Application conditions
- Test conditions
- Acceptance criteria
During Repeat Validation
Preserve the approved:
- Materials
- Preparation
- Application method
- Assembly basis
- Conditioning basis
- Acceptance criteria
Preventing repeat bond failure requires control of the complete bonding process, not just changing the adhesive. Preserve the validated substrates, preparation, application method, assembly conditions, cure basis, and acceptance criteria, and revalidate when a material or process variable changes.
What Importers and Private-Label Buyers Should Record
A useful failure record should preserve both the failed condition and the corrective test condition.
| Record | Why It Matters |
|---|---|
| Product / sample / batch | Traceability |
| Substrate A / B | Defines the real bond system |
| Coating / finish | Helps diagnose surface-layer failure |
| Surface preparation | Supports repeatability |
| Application method | Allows process comparison |
| Assembly timing | Supports timing investigation |
| Support / load timing | Helps diagnose early movement |
| Environment | Provides conditioning and exposure context |
| Failure mode | Directs root-cause investigation |
| Corrective action tested | Creates validation history |
| Final retest result | Supports approval or further investigation |
Without a comparison between the failed condition and the corrective test condition, buyers may know that a problem occurred but not whether the proposed corrective action actually addressed it.
If a corrective condition has been validated and needs to become part of a private-label product requirement, continue with How to Specify No More Nails Adhesive for Private Label Programs.
When Should You Reconsider the Adhesive Grade?
A failed joint does not automatically mean a different adhesive should be selected. First distinguish between a process problem and a product-fit problem.
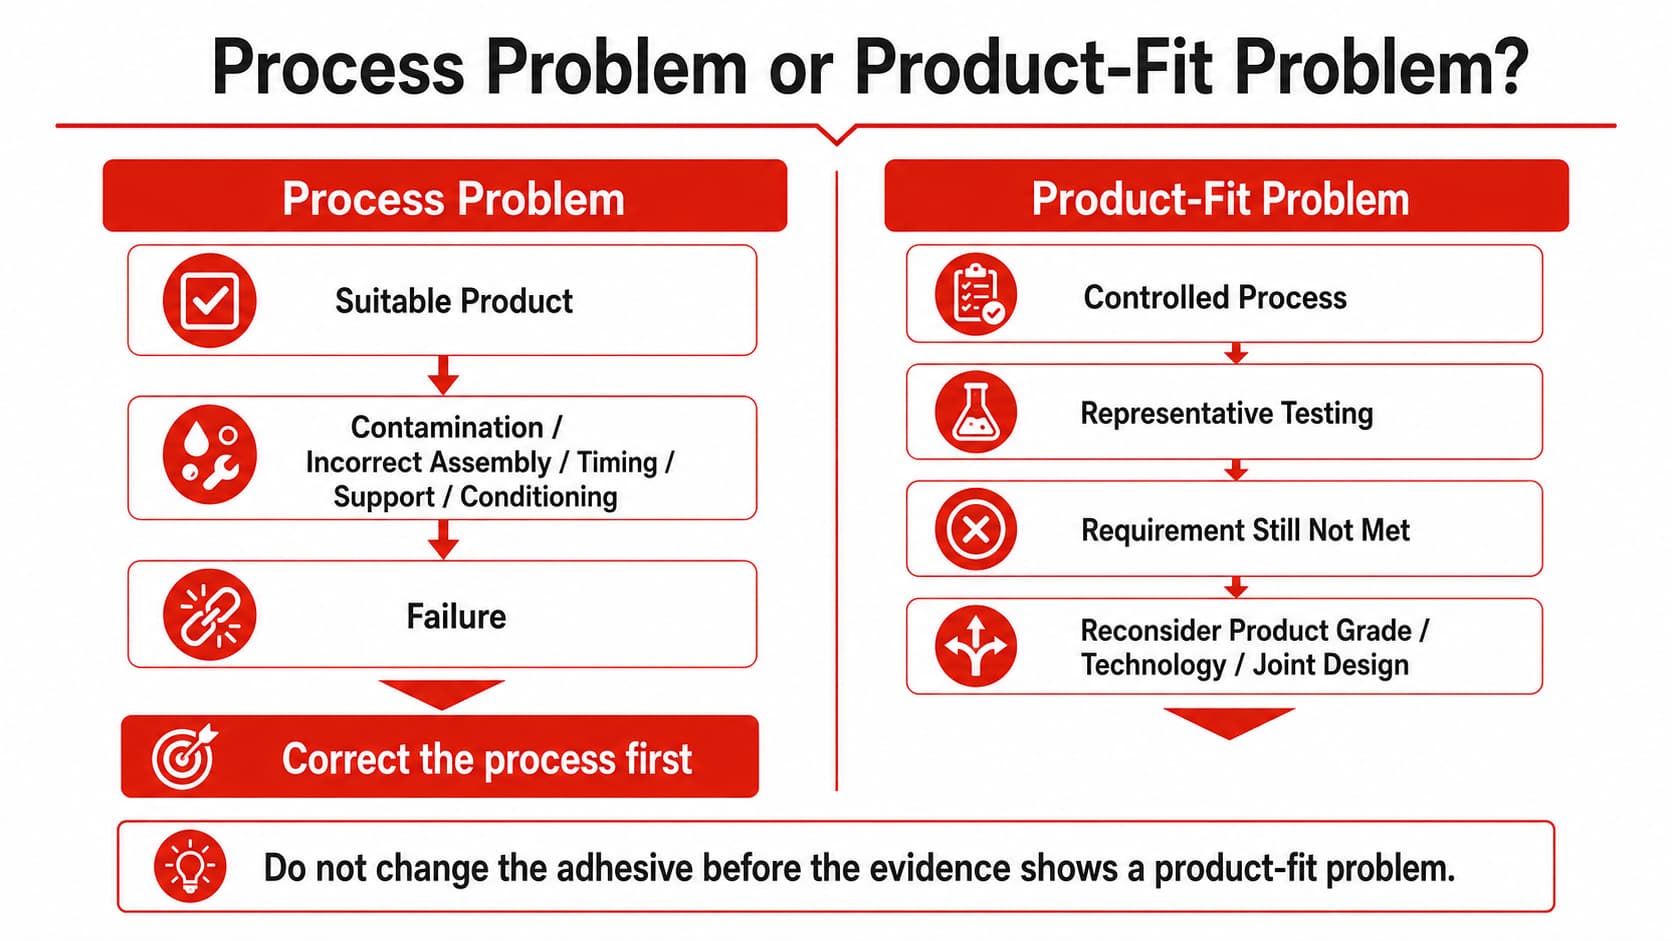
Process Problem
A product may be suitable in principle but applied under unsuitable or uncontrolled conditions, such as:
- Contaminated substrate
- Inconsistent assembly
- Unsuitable application timing
- Insufficient support
- Uncontrolled conditioning
If correcting the process produces consistent acceptable results, changing the adhesive may not be necessary.
Product-Fit Problem
Reconsider the adhesive grade when controlled testing shows that the current product does not meet the required substrate, movement, installation, environmental, or developed-performance conditions even after the important process variables have been correctly controlled.
At that point, the next step may be to:
- Evaluate another grade
- Reconsider the adhesive technology
- Change the joint design
- Revise the application requirement
If the question becomes whether the application would be better served by a No More Nails construction adhesive or another adhesive technology, review the No More Nails vs MS Polymer Adhesive comparison guide.
Change the adhesive when the evidence indicates a product-fit problem, not simply because the first failed assembly was visually dramatic.
Evaluating a KINGDELI No More Nails Failure Case
If the failed project involves a KINGDELI No More Nails adhesive, prepare the bonding-system information before moving into a product-level technical discussion.
Useful information includes:
- Substrate A and Substrate B
- Paint, coating, laminate, or other surface finish
- Surface preparation
- Product or sample identification
- Adhesive application method
- Assembly timing
- Support and early-load conditions
- Conditioning or exposure environment
- Where the adhesive remained after failure
- Whether coating or substrate damage occurred
- Photographs or test observations where available
This information can help narrow the technical discussion toward the substrate or coating system, application conditions, controlled retesting, or product-fit evaluation.
The troubleshooting framework in this article is a practical diagnostic approach. It should not be interpreted as a claim that every KINGDELI product or failure case follows one universal internal failure-analysis SOP.
Common Bond-Failure Troubleshooting Mistakes
Assuming Every Failure Is an Adhesive Defect
A detached component does not identify the failed layer. Inspect the failure location first.
Changing Several Variables at the Same Time
If the adhesive, substrate, preparation, bead, and conditioning conditions all change together, an improved result does not reveal which change mattered.
Calling Coating Failure an Adhesive Failure
If paint or coating detaches from the base material while remaining attached to the adhesive, investigate the coating system.
Judging Only by Initial Grab
Strong early holding does not prove developed bond performance. Initial grab and final performance answer different questions.
Retesting Without Recording the Original Failure Mode
If the original failure condition is not documented, it becomes difficult to determine whether the retest addressed the same problem.
Changing the Adhesive Before Confirming the Failure Cause
A new adhesive may appear to solve a process problem while leaving the actual cause unidentified.
Treating One Successful Retest as Proof
One successful specimen is evidence. Consistent, representative repeat results provide stronger confirmation.
FAQ: No More Nails Adhesive Bond Failure
Why is my No More Nails adhesive not sticking?
There is no single cause. Possible factors include surface contamination, weak coatings, poor contact, unsuitable assembly timing, incomplete cure development, joint loading, environmental exposure, substrate compatibility, or a mismatch between the exact product grade and the application. Start by identifying where the joint separated before assigning a cause.
Does adhesive peeling off a painted wall mean the adhesive failed?
Not necessarily. If the adhesive remains attached to the paint while the paint separates from the wall, the coating-to-wall interface may be the weaker part of the system. Record where the paint and adhesive remain after failure before deciding which interface should be investigated.
What is the difference between interfacial failure and cohesive failure?
Interfacial failure occurs when separation takes place at the adhesive-to-substrate interface. Cohesive failure occurs within the adhesive layer itself, leaving adhesive on both sides. Neither failure mode alone determines whether the product is acceptable; the result must be interpreted against the application requirement.
Can insufficient cure cause a construction adhesive bond to fail?
Yes. A joint can be affected if it is moved, handled, or loaded before enough performance develops for the application. The actual cure basis depends on the exact product, joint geometry, substrates, and conditions. For detailed validation, see the No More Nails Adhesive Open Time, Grab Strength, and Cure Testing Guide.
Should I change adhesive after a bond failure?
Not automatically. First determine whether the failure came from the bonding process, substrate or coating, cure conditions, joint design, environment, or product fit. Consider changing the adhesive grade or technology when controlled testing shows that the current product does not meet the application requirement even after the important process variables have been correctly controlled.
Diagnose the Failure Before Changing the Adhesive
The most useful bond-failure investigation begins with evidence.
Where did it fail?
What changed?
Which possible causes fit that failure mode?
Which hypothesis can be tested by changing one main variable?
Does the corrective action produce consistent results under representative conditions?
A useful root-cause investigation:
- Starts with the failure location
- Separates failure mode from root cause
- Documents the original process
- Forms testable hypotheses
- Isolates suspected variables
- Compares repeated results
- Preserves validated corrective actions
Diagnose the failure before changing the adhesive. Change the product only when the evidence shows that the current grade does not fit the real application.
Discuss Your Bonding Application or Failure Case
If you are troubleshooting a KINGDELI No More Nails project, prepare the substrate pair, surface finish, preparation, product or sample identification, application method, assembly timing, load or support conditions, environment, failure location, and available photographs or test observations.
These details help narrow the technical discussion toward the bonding process, substrate or coating system, controlled retesting, or product-fit evaluation.
Discuss Your Bonding Application or Failure CaseView No More Nails Adhesives
No More Nails Adhesive Bond Failure: Causes, Testing, and Prevention
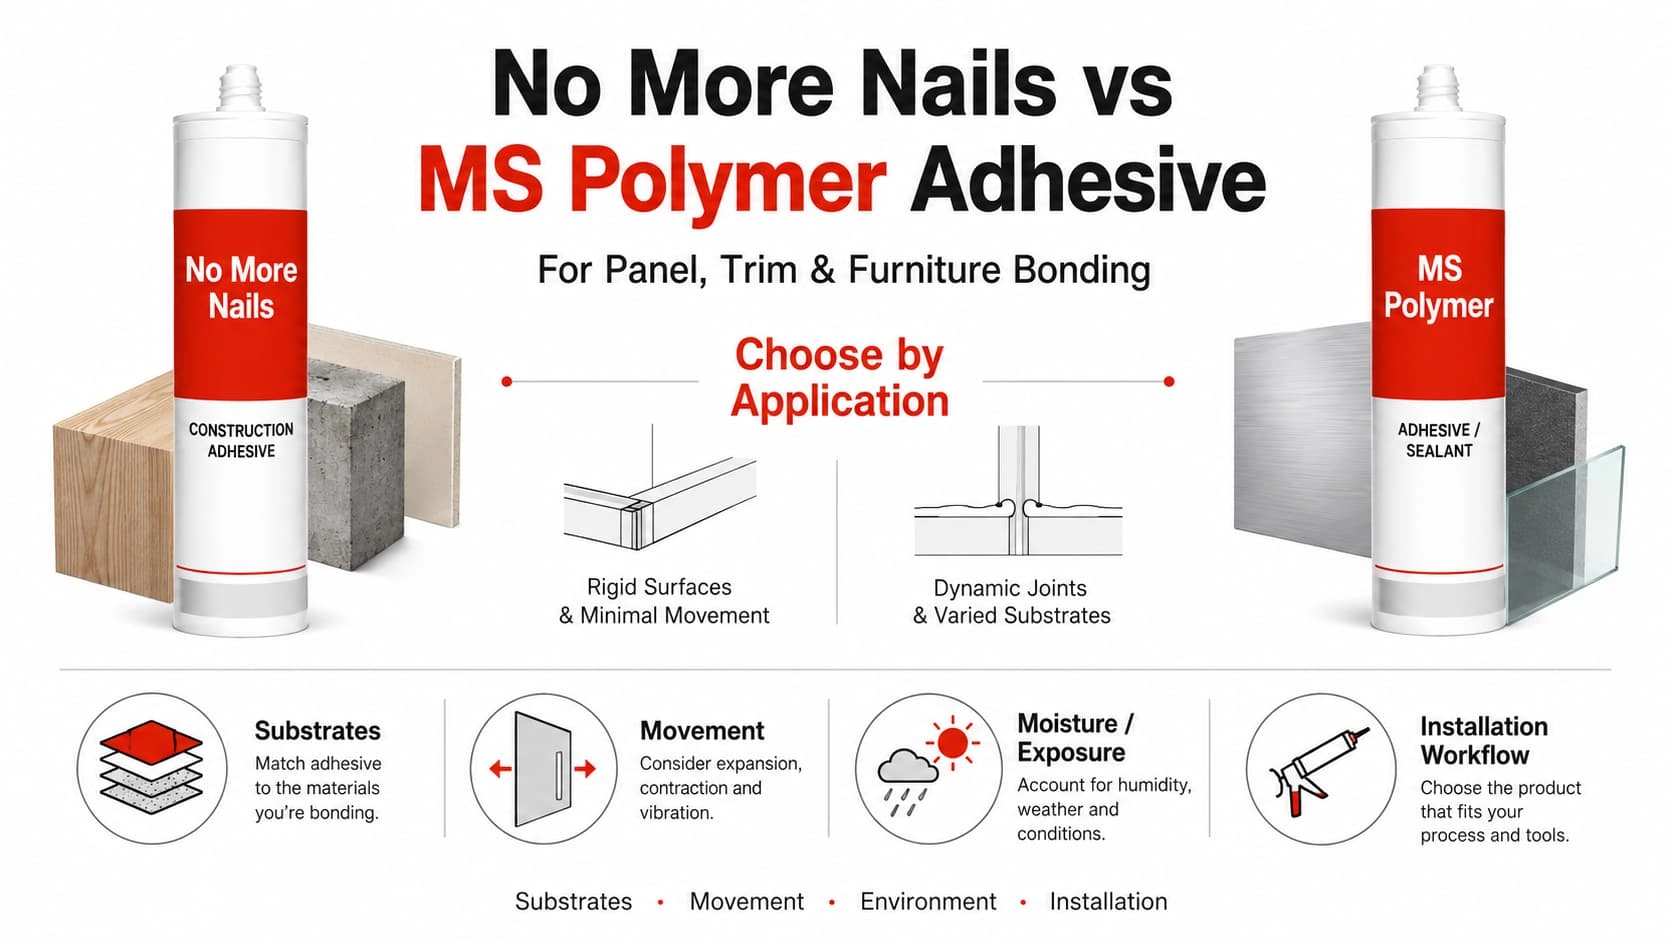
No More Nails vs MS Polymer Adhesive for Panel, Trim, and Furniture Bonding
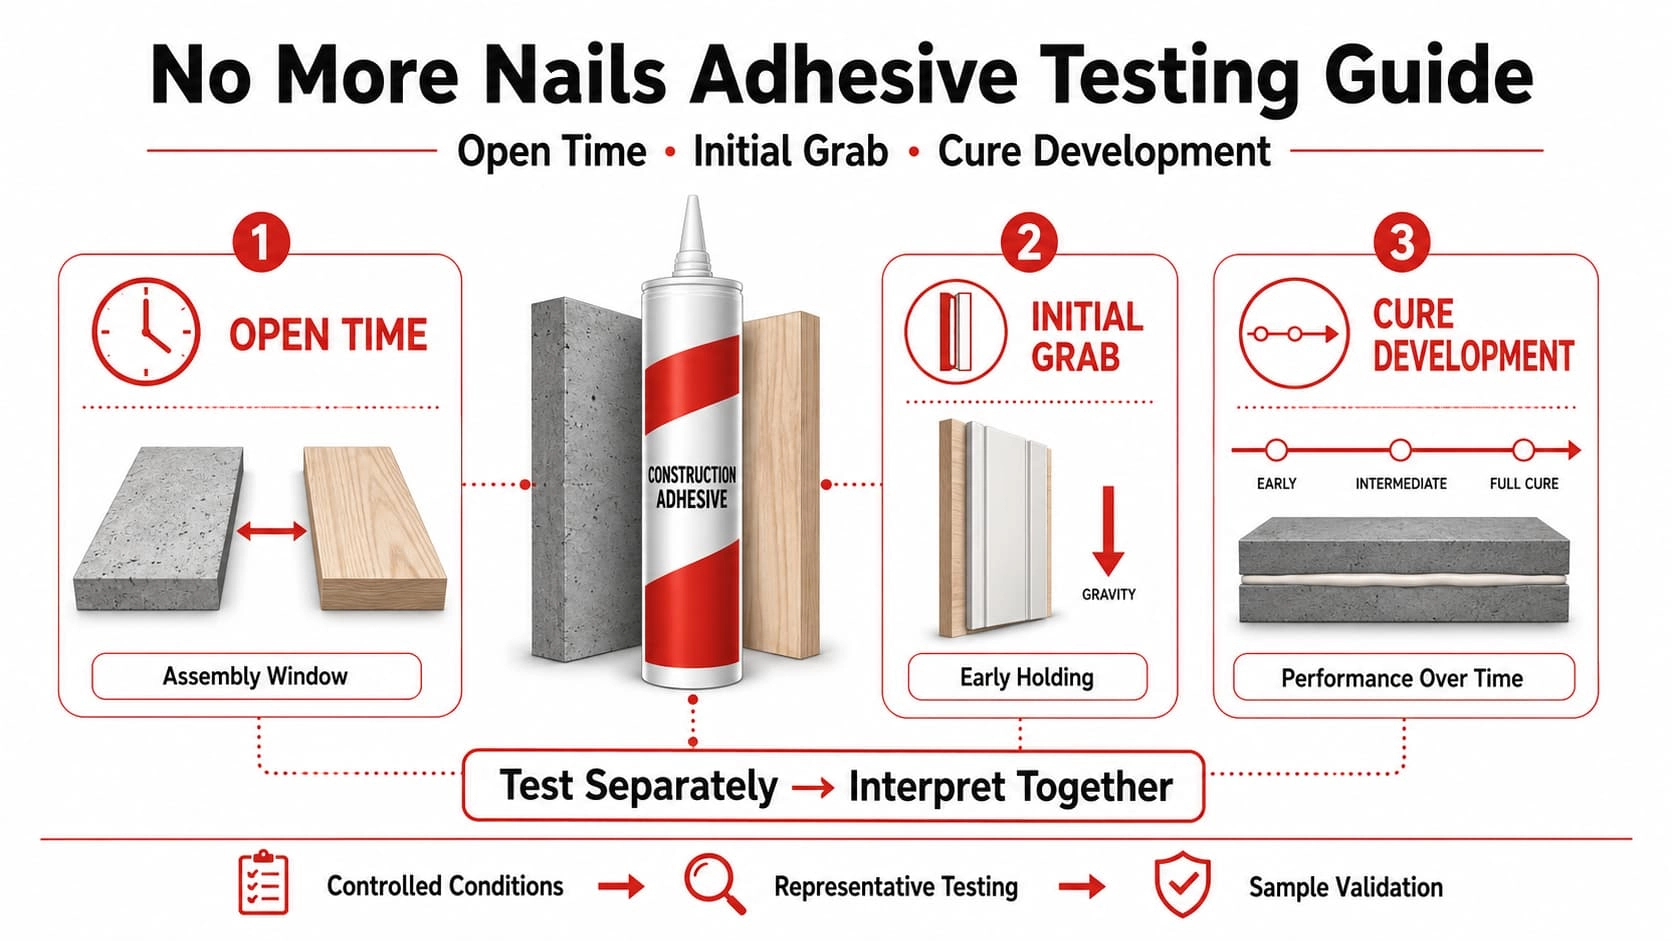
No More Nails Adhesive Open Time, Grab Strength, and Cure Testing Guide
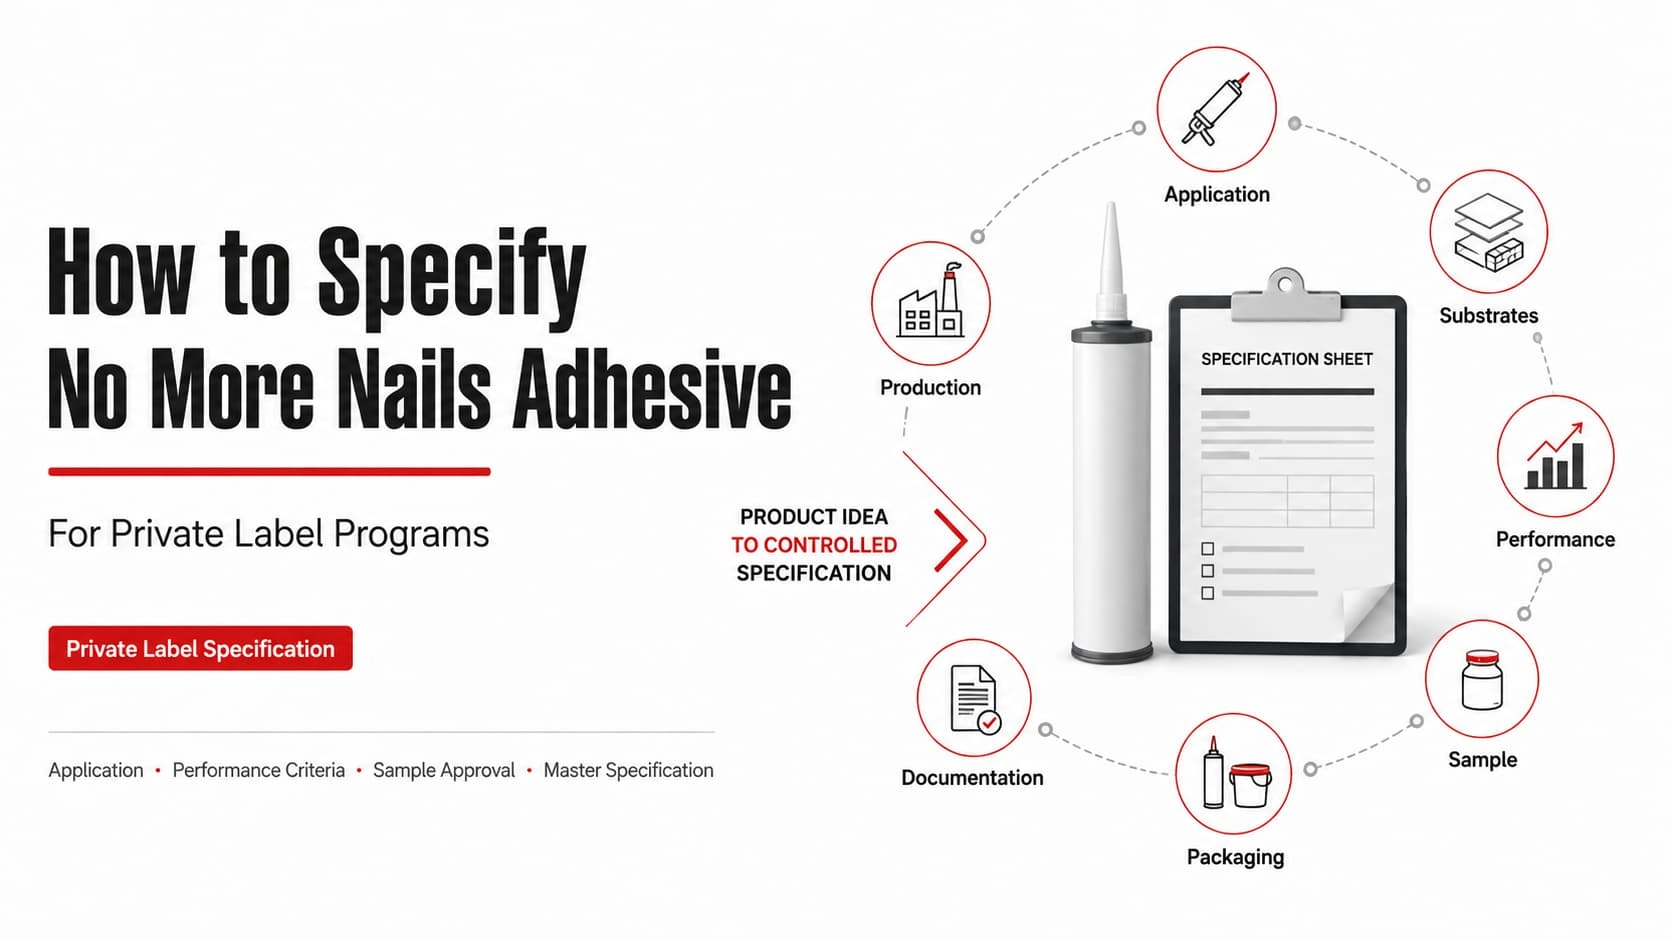
How to Specify No More Nails Adhesive for Private Label Programs
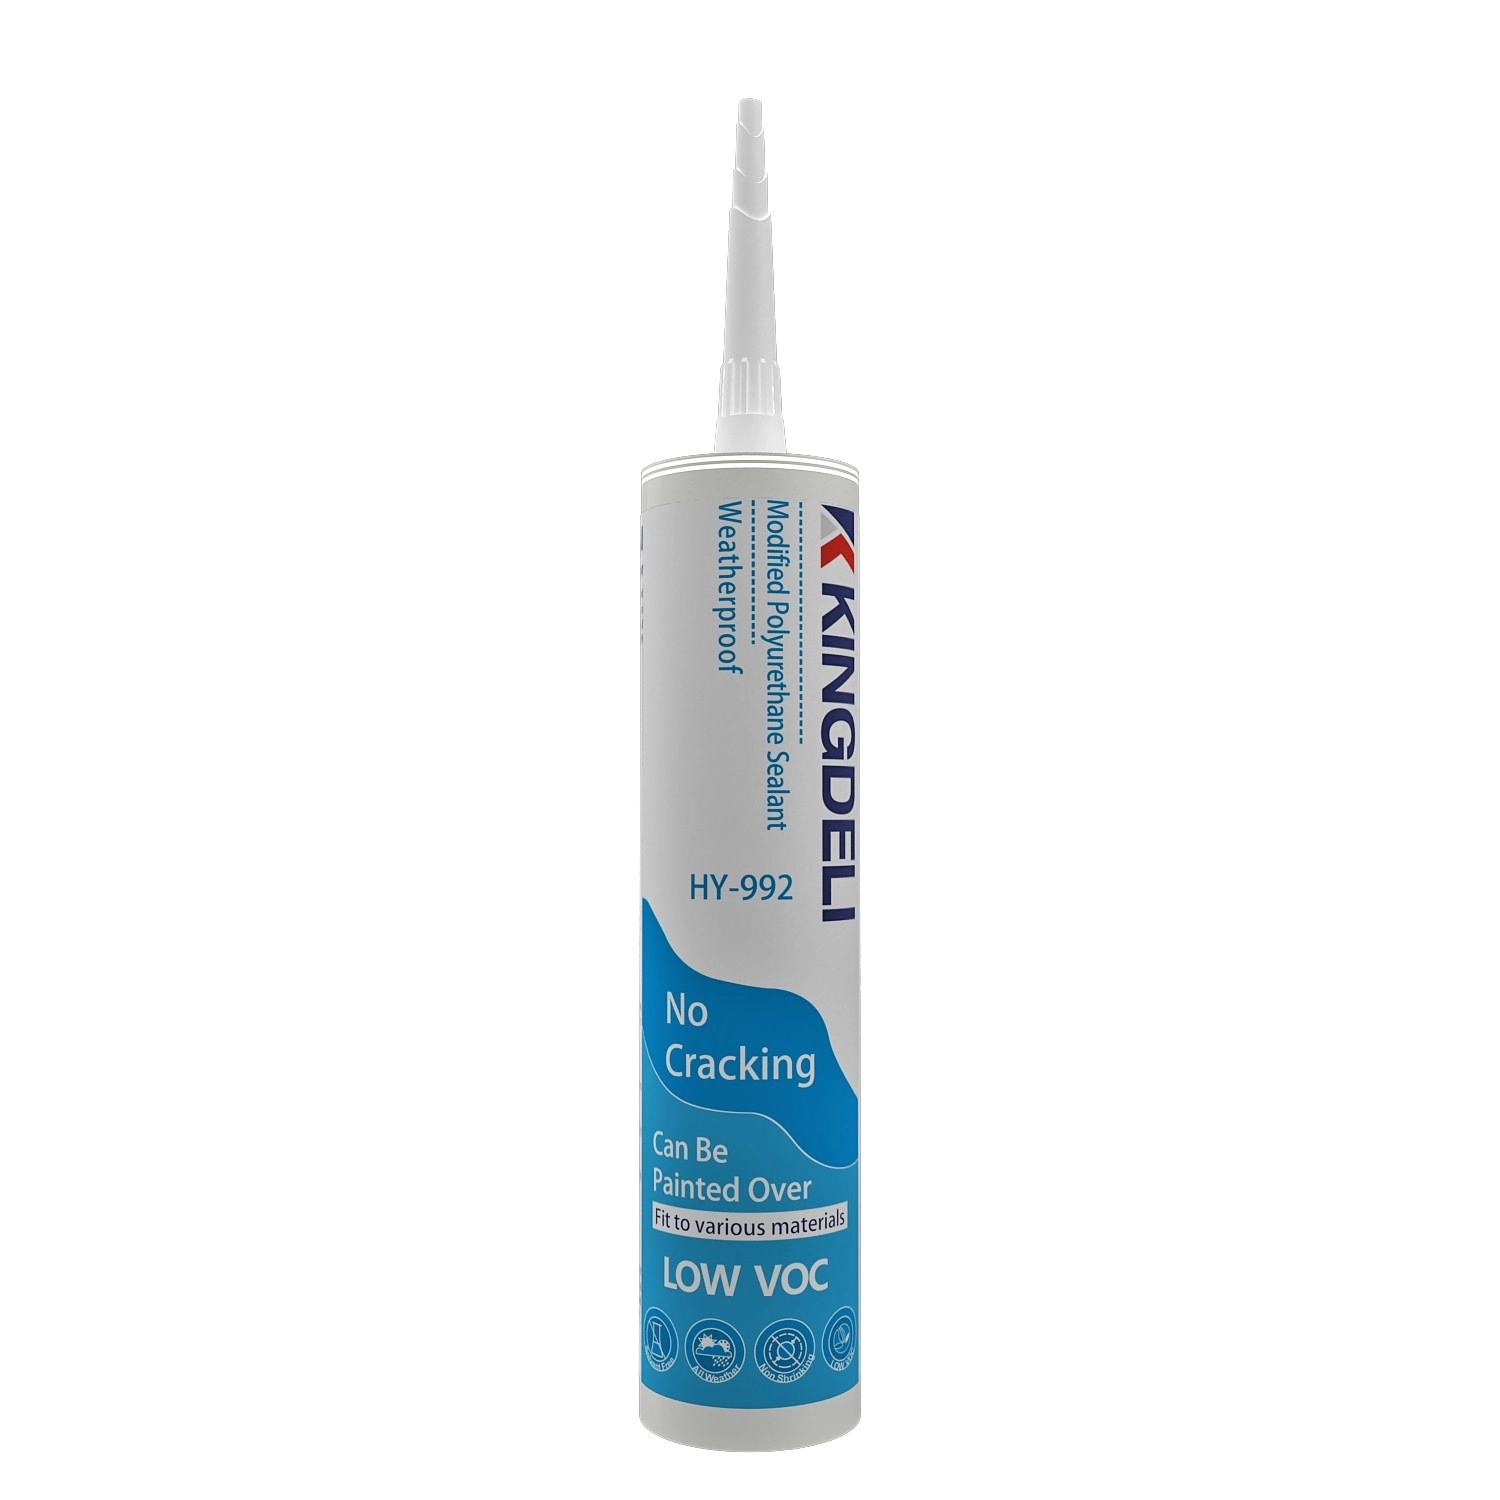
HY992 Modified Polyurethane Construction Sealant
HY992 Modified Polyurethane Sealant is a one-component, moisture-curing construction sealant designed for professional building and structural sealing applications. It provides excellent adhesion, weather resistance, and durable elasticity, making it suitable for a wide range of construction materials.
The formulation delivers strong bonding performance without corrosion or substrate contamination, while maintaining low VOC content for environmentally responsible construction projects.

HY995 Crystal Clear Ms Polymer Adhesive/Sealant
HY995 Crystal Clear Ms Polymer Adhesive/Sealant is a new generation MS Polymer adhesive / sealant formulated for all bonding and sealing applications where long term reliability is required. It has excellent bonding strength on various materials. It will cure to form a durable, flexible, waterproof seal.

HY997 High-Performance Anti-Microbial MS Polymer Sealant
HY997 MS polymer sealant for is is a premium one-component, neutral-curing modified silane sealant engineered for demanding interior applications. It offers a Class 20 movement capability, ensuring long-lasting flexibility and reliable performance under dynamic joint conditions. Curing at room temperature, HY997 delivers superior anti-microbial and mildew-resistant properties, maintaining hygienic and clean environments over time.
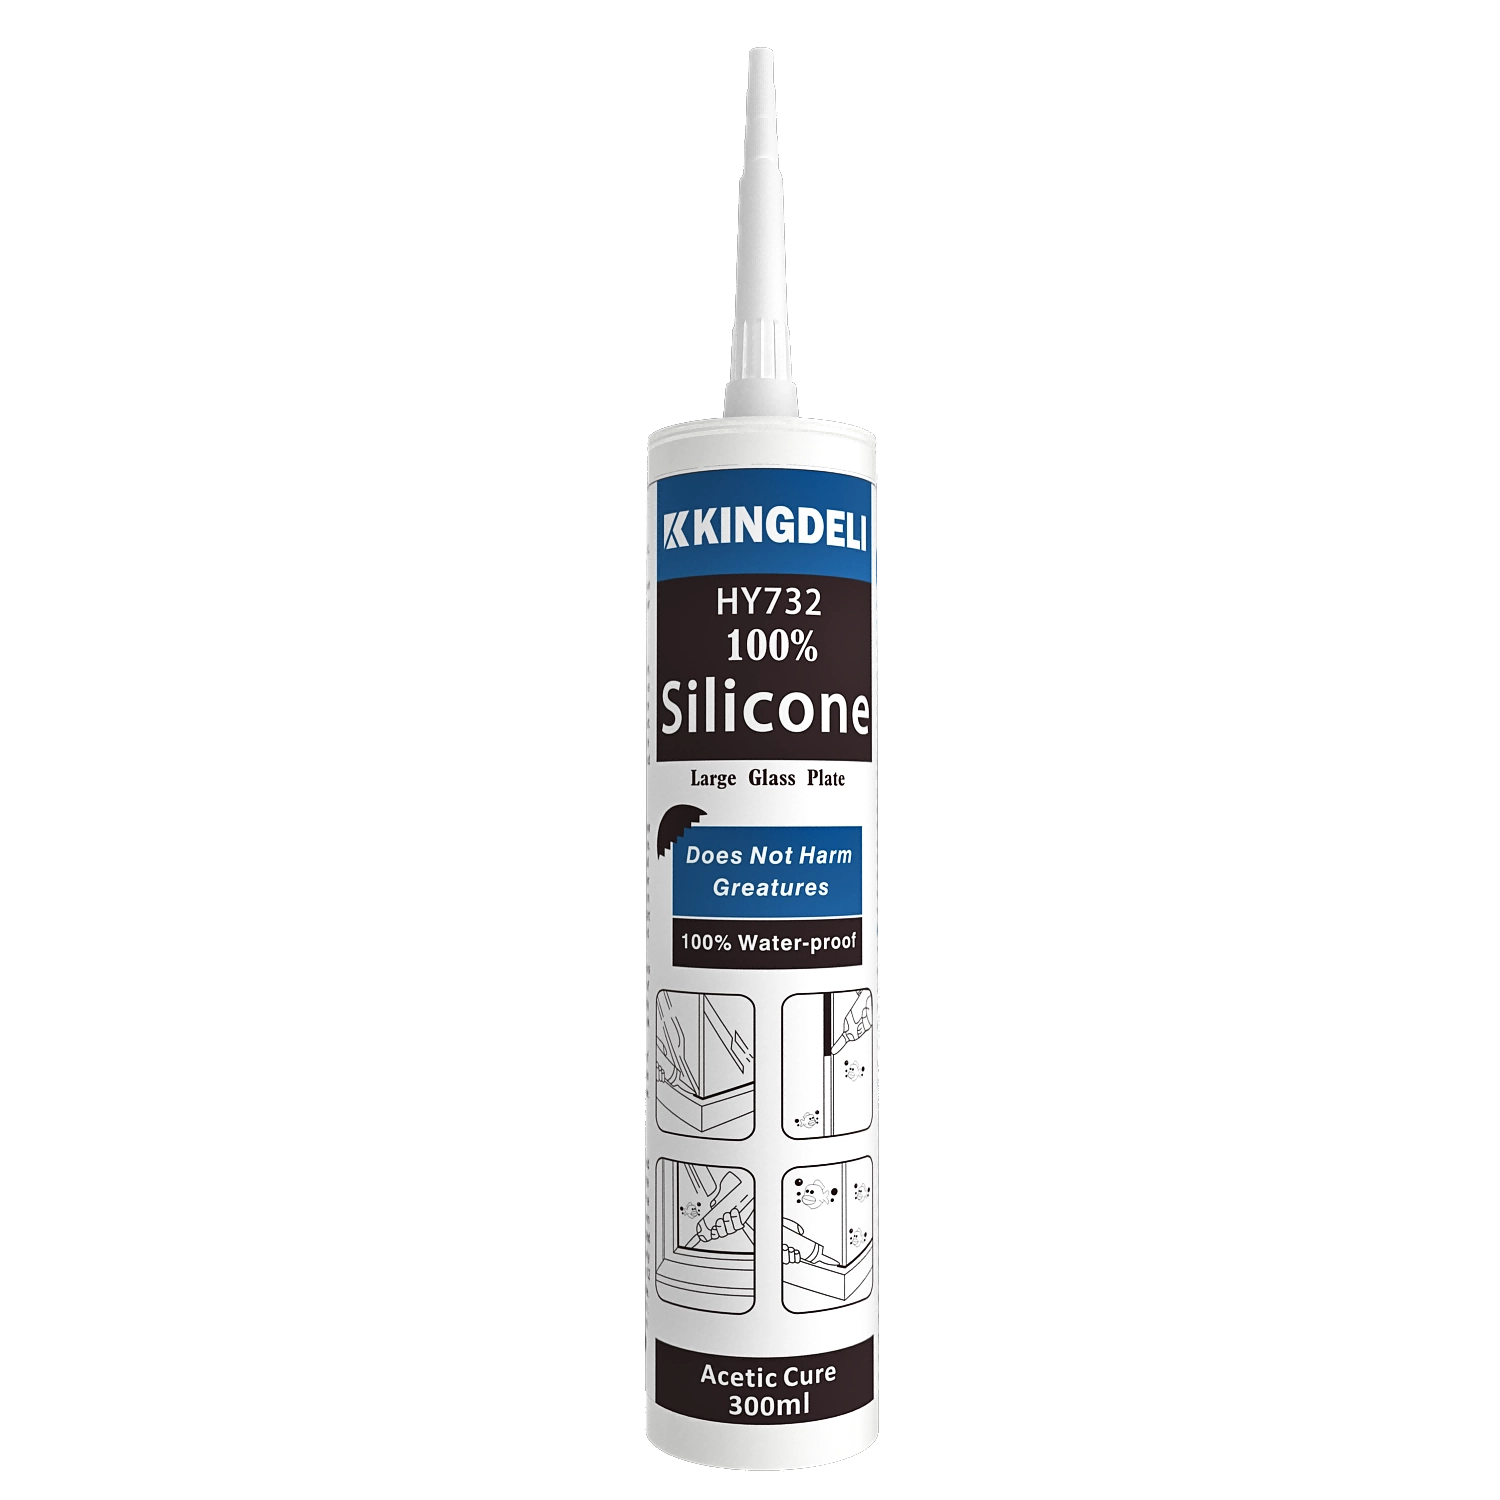
KINGDELI HY732 Professional Acetoxy Cure Silicone Sealant
KINGDELI HY732 is a professional-grade, one-component acetoxy cure silicone sealant designed for fast curing, strong adhesion, and long-lasting flexibility. Ideal for aquariums, glass applications, aluminum doors and windows, kitchens, and bathrooms, it provides reliable sealing performance with excellent anti-fungal protection in high-humidity environments.
Let’s Build Stronger Bonds with Quality Adhesives and Sealants
Have questions about the topic or need tailored sealant solutions for your project?
Our team is ready to provide expert guidance, product recommendations, and application support.
Innovating with Integrity, Bonding the World
Since 1998, KINGDELI has delivered trusted, sustainable sealant solutions that connect industries and inspire progress worldwide.
Whatsapp: +8618825946249
Kingdeli
Kingdeli
Kingdeli
Kingdeli
Kingdeli